Volusion Translation Plugin
How Do You Install ConveyThis On:

Integrating ConveyThis into your site is fast and easy, and Squarespace is no exception. In just a few minutes you’ll learn just how to install ConveyThis to Squarespace and start giving it the multilingual functionality you need.
Step #1
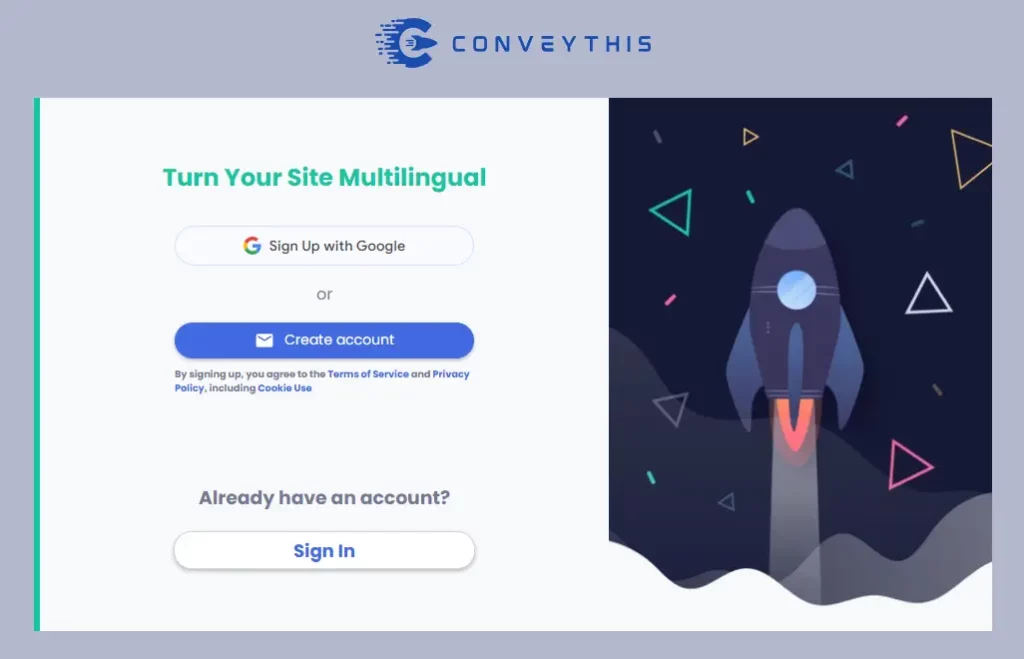
Create a ConveyThis.com account and confirm it.
Step #2
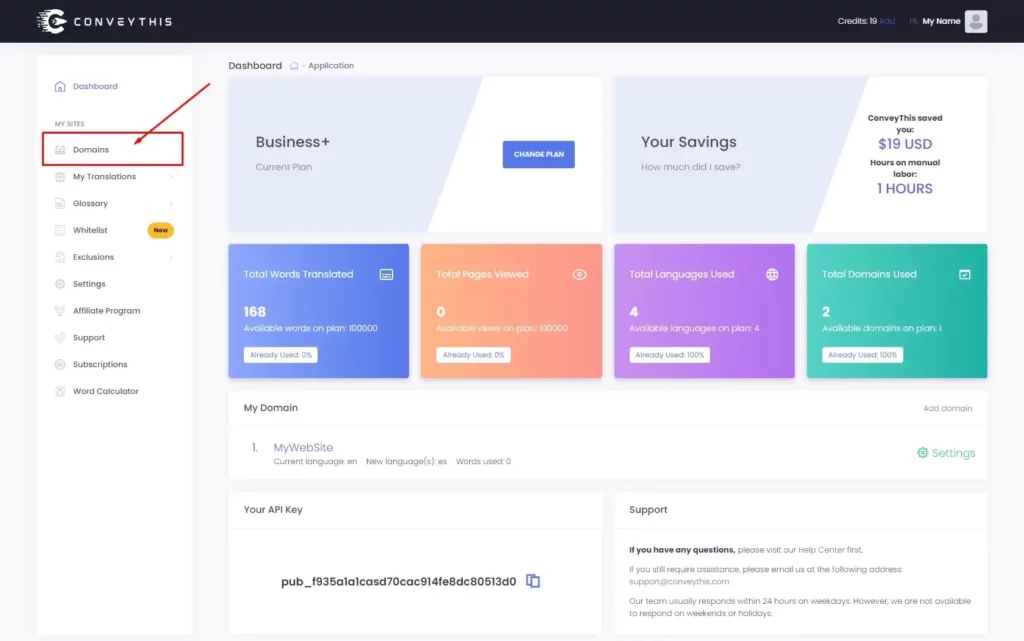
On your dashboard (you have to be logged in) navigate to «Domains» in the upper menu.
Step #3
On this page click “Add domain”.
There is no way to change domain name, so if you made a mistake with the existing domain name, simply delete it and create the new one.
Once you done, click to “Settings”.
*If you installed ConveyThis previously for WordPress/Joomla/Shopify, your domain name was already synced to the ConveyThis and will be visible on this page.
You can skip adding domain step and just click to «Settings» next to your domain.
Step #5
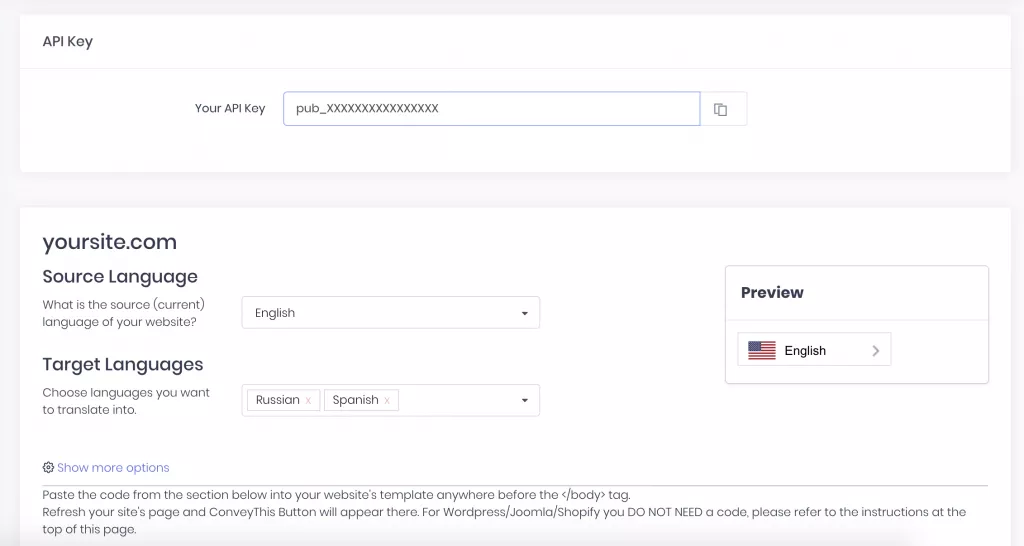
Now scroll down and copy the JavaScript code from the field below.
					<!-- ConveyThis code -->
<script type="rocketlazyloadscript" data-minify="1" src="https://www.conveythis.com/wp-content/cache/min/1/javascript/conveythis-initializer.js?ver=1714226774" defer></script>
<script type="rocketlazyloadscript" data-rocket-type="text/javascript">
  document.addEventListener("DOMContentLoaded", function(e) {
    ConveyThis_Initializer.init({
      api_key: "pub_xxxxxxxxxxxxxxxxxxxxxxxx"
    });
  });
</script>
<!-- End ConveyThis code -->
*Later on you may want to make some changes in the settings. To apply them you will need to make those changes first and then copy the updated code on this page.
*For WordPress/Joomla/Shopify you DO NOT need this code. For more information please refer to the instructions of the associated platfrom.
Step #7
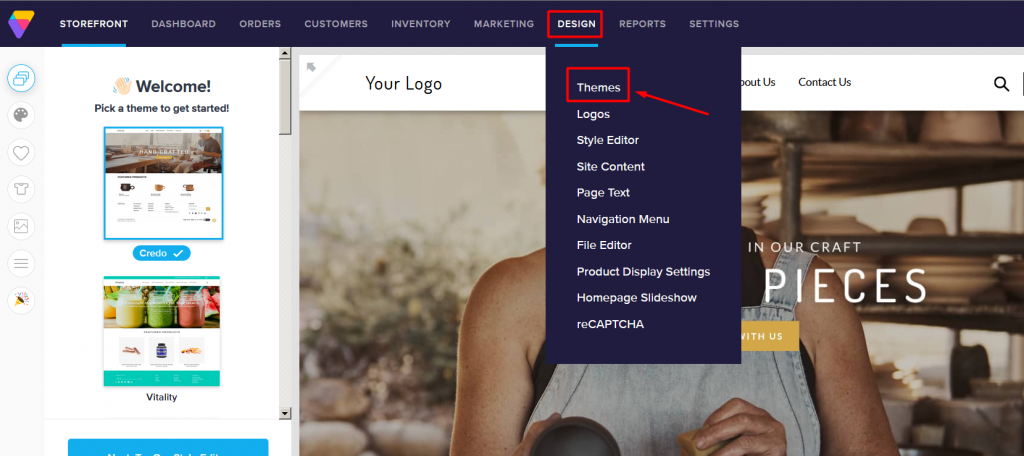
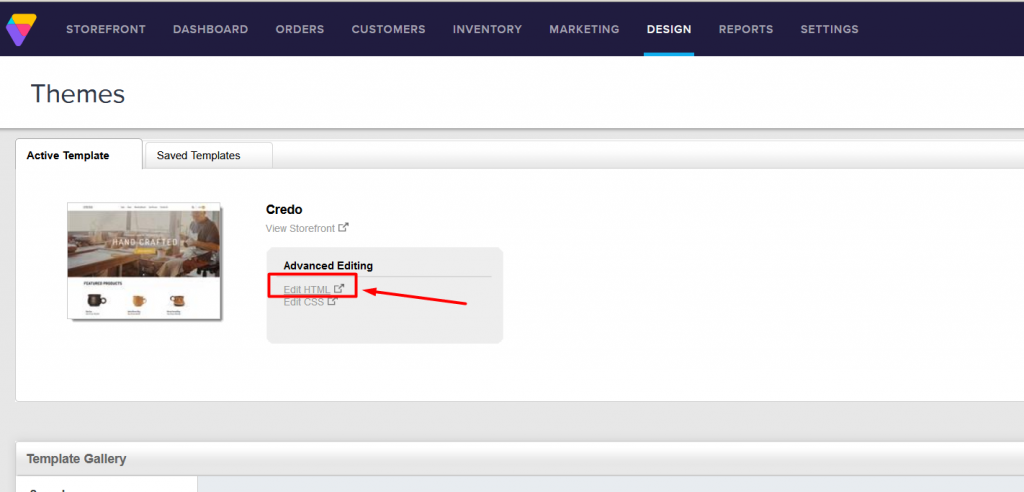
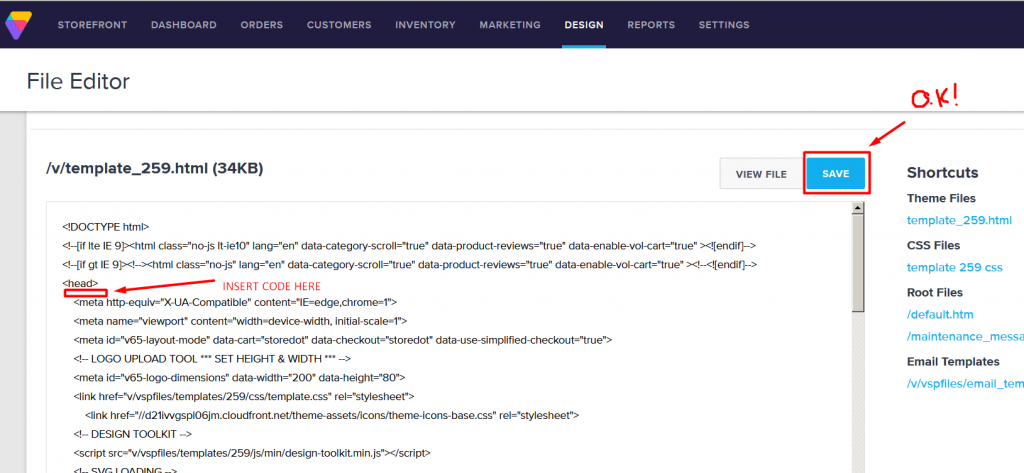
On this page you see the code of your current theme.
You need to paste the code to the top. Look for «» meta tag and paste your code right after it. Click on «save» button.
*Later on you may want to make some changes in the settings. To apply them you will need to make those changes first and then copy the updated code on this page.
*For WordPress/Joomla/Shopify you DO NOT need this code. For more information please refer to the instructions of the associated platfrom.
Step #8
That’s it. Please visit your website, refresh the page and the language button shows up there.
Congratulations, now you can start translating your website.
*If you want to customize the button or get familiar with an additional settings, please go back to the main configuration page (with language settings) and click «Show more options».
*Later on you may want to make some changes in the settings. To apply them you will need to make those changes first and then copy the updated code on this page.
*For WordPress/Joomla/Shopify you DO NOT need this code. For more information please refer to the instructions of the associated platfrom.
