
How to add CNAME records in DNS manager?
Use this guide after you choose the サブドメイン URL structure in ConveyThis. Each language then lives on its own address, for example es.example.com, and needs one CNAME record in your DNS manager.
1. Find the records you need in ConveyThis
In your ConveyThis ダッシュボードで、ウェブサイトの次のメニューを開きます: 設定 menu on your website, choose 設定, expand 高度な and find Url Structure. Select Sub-domain (great for SEO). ConveyThis shows one row per language: the 名前 is the language sub-domain, and the CNAME target is dns2.conveythis.com.
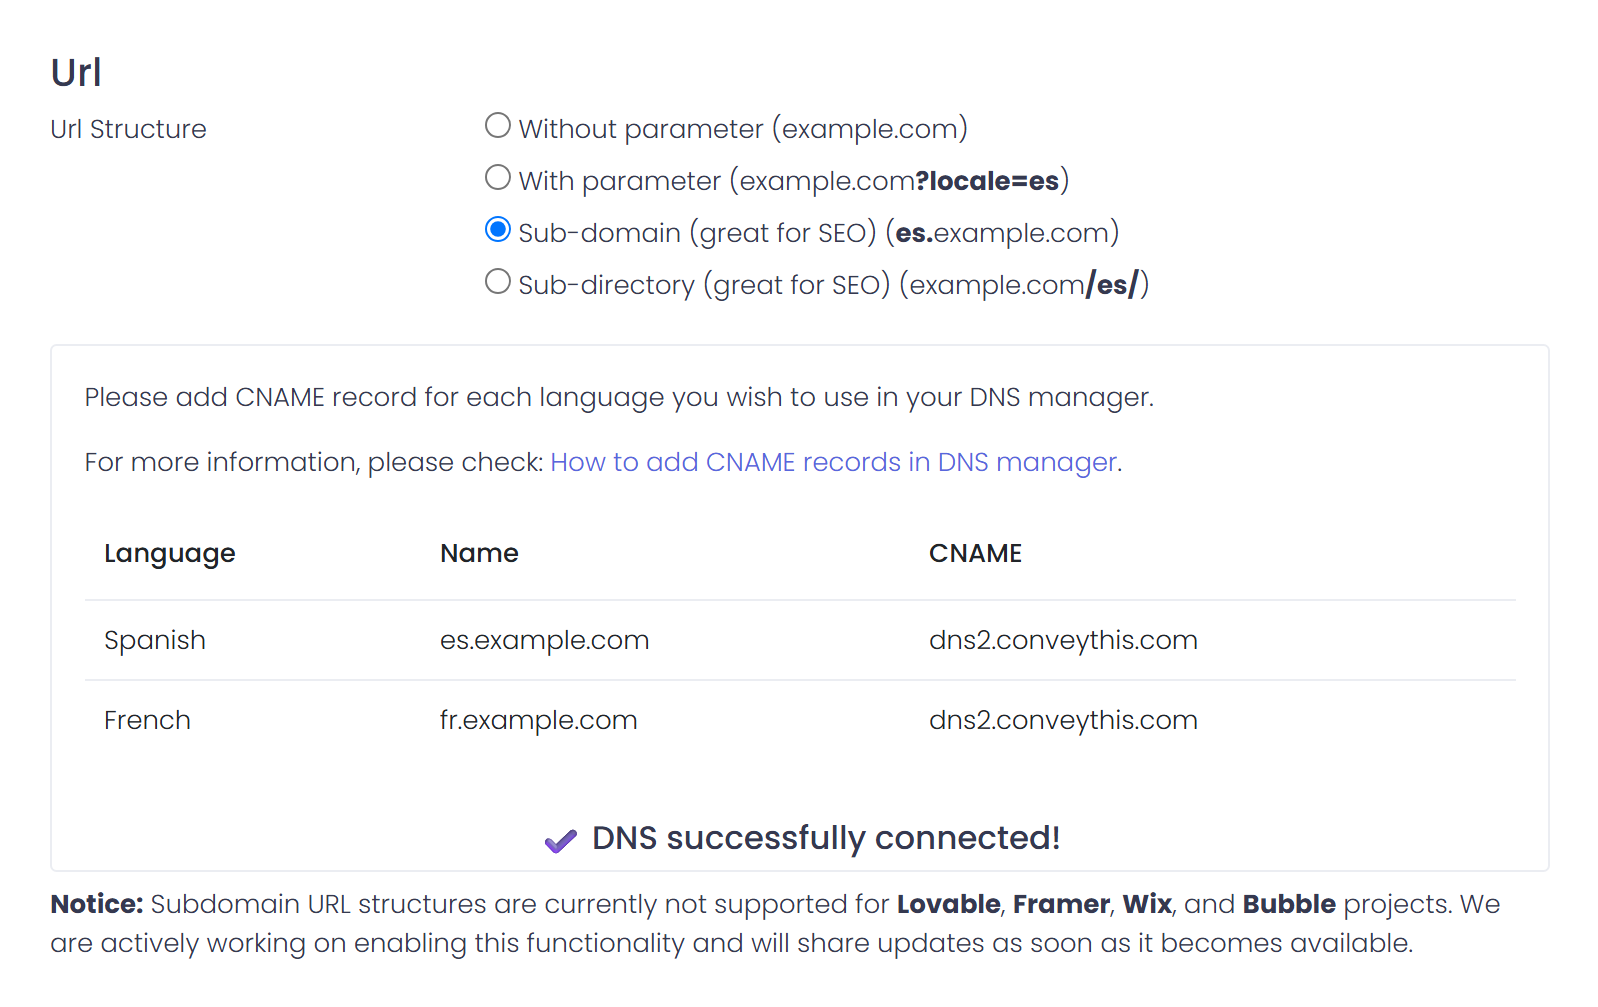
Sub-domains are available on Business plans and higher. They are not available for Wix, Bubble, Framer and Lovable sites yet.
2. Find your DNS provider
The records go wherever your domain’s DNS is managed. This is usually your domain registrar or your hosting company. To check, look up your domain’s NS records in the Google Dig tool.
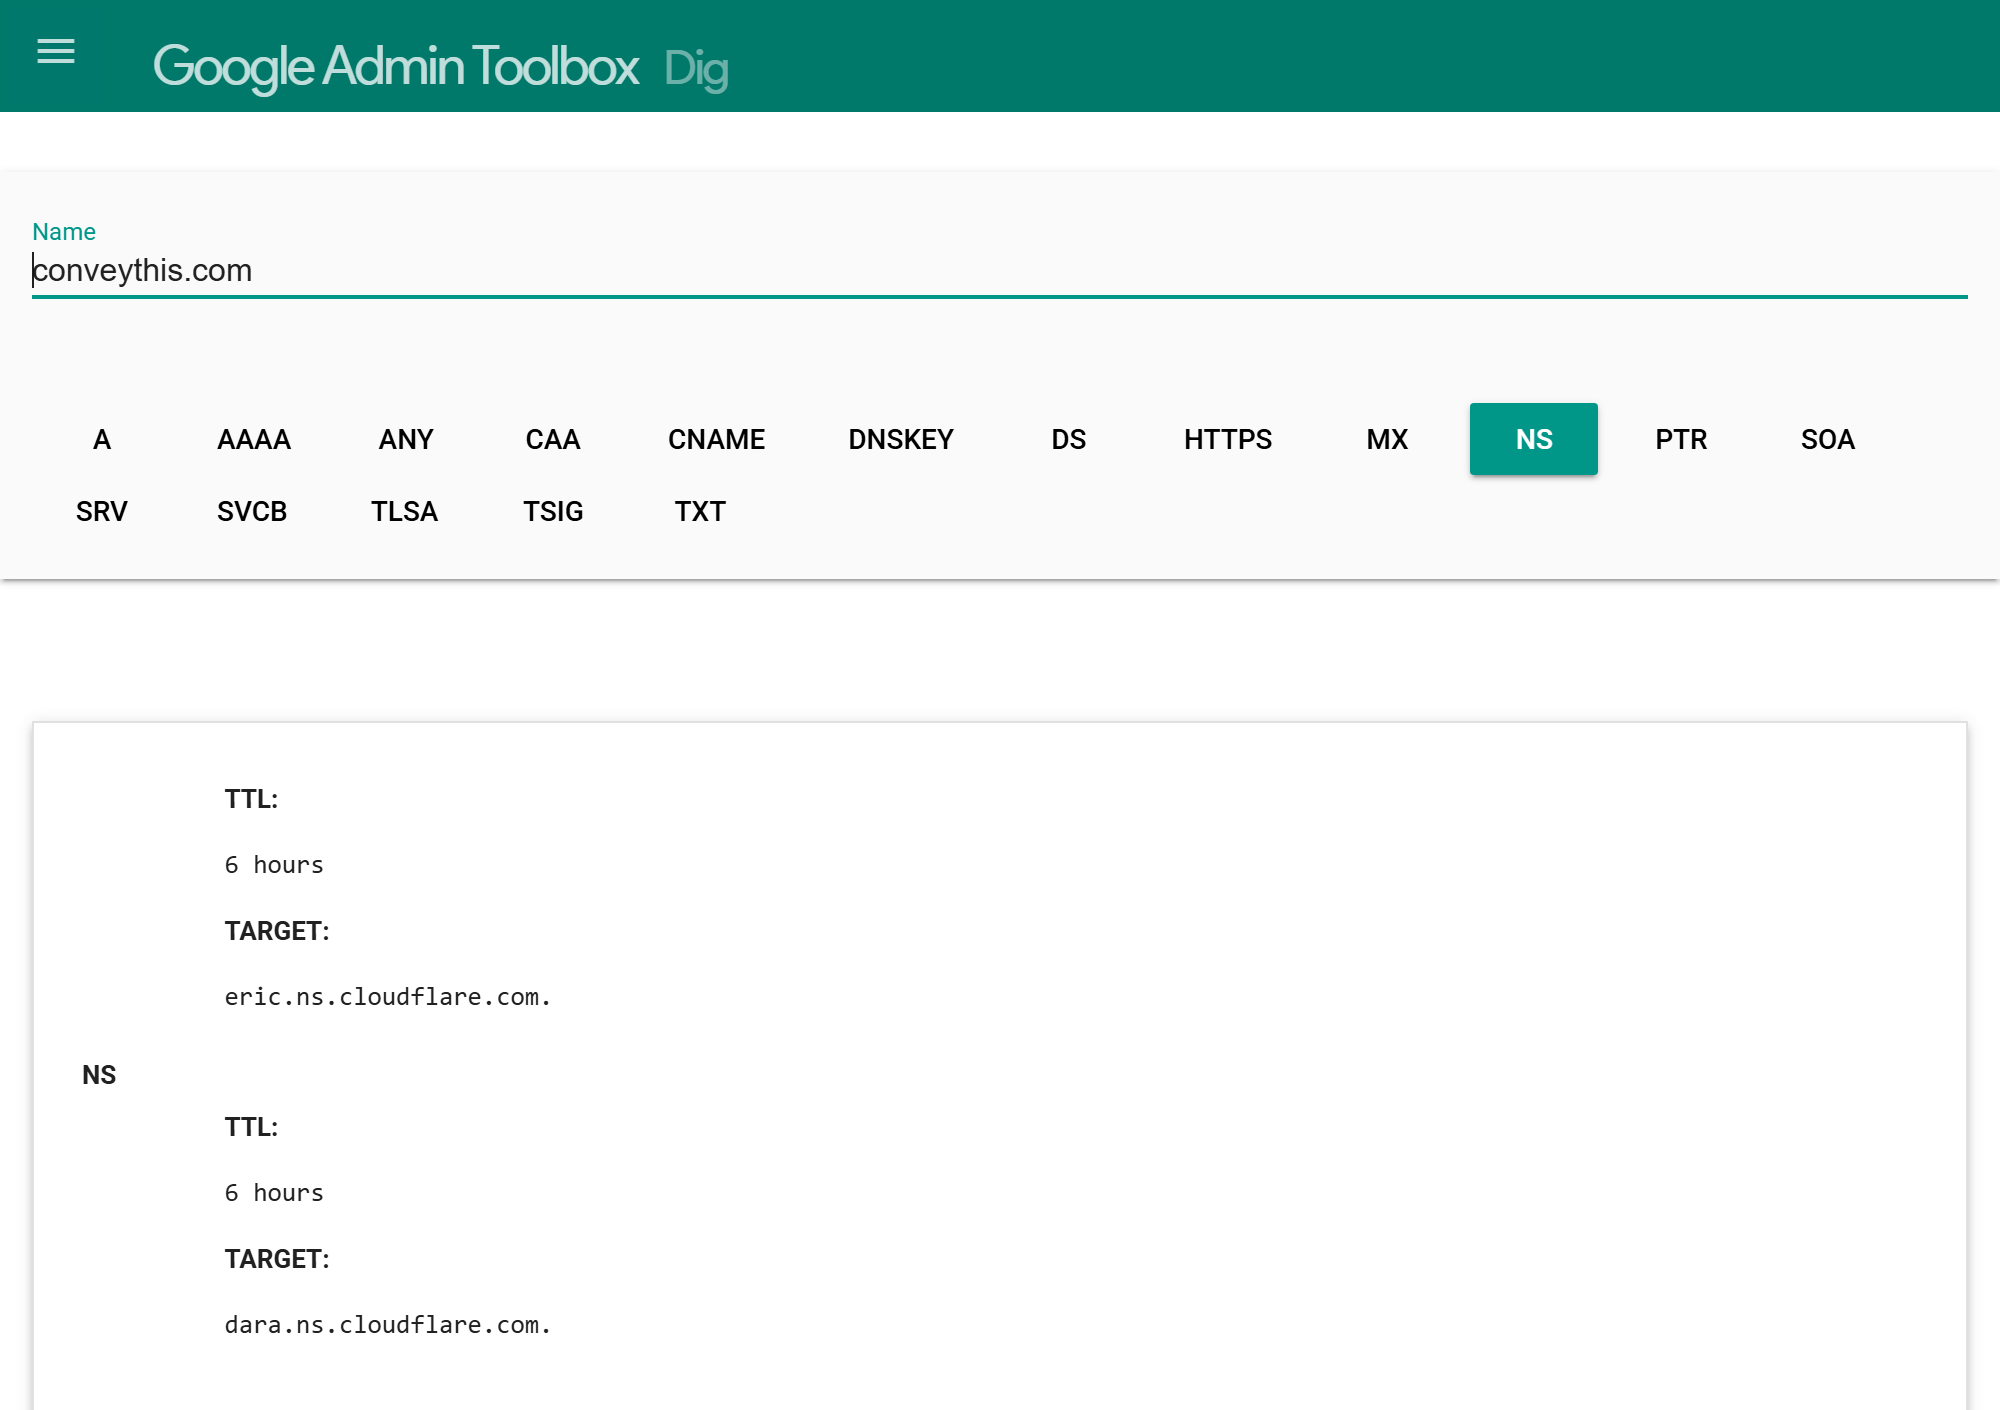
The name servers tell you who hosts your DNS. In the example above it is Cloudflare. domaincontrol.com means GoDaddy, and a name that mentions your hosting company means your host manages it.
3. Add the CNAME records
Add one CNAME record per language. In most DNS managers the fields are:
- Type: CNAME
- Name / Host: the language code only, for example
es(not the fulles.example.com) - Target / Points to / Value:
dns2.conveythis.com
Cloudflare
- Log in to cloudflare.com and select your domain.
- 開く DNS → Records そしてクリックします Add record.
- Choose CNAME, enter the language code as the name and
dns2.conveythis.comas the target. - Set Proxy status → DNS only (grey cloud). A proxied (orange) record will not work.
- 次をクリックします: 保存.
GoDaddy
- Log in to godaddy.com そして開く My Products → Domains.
- Next to your domain, open DNS (Manage DNS).
- 次をクリックします: Add New Record 。次のように設定します: タイプ → CNAME.
- Set 名前 to the language code and Value →
dns2.conveythis.com. - 次をクリックします: 保存.
Hosting control panel (cPanel)
- Log in to your hosting control panel.
- 開く Zone Editor (older versions: Simple Zone Editor).
- Add a CNAME record: set 名前 to the language code and CNAME →
dns2.conveythis.com. - 次をクリックします: Add Record.
Shopify-managed domains
If you bought your domain from Shopify:
- In your Shopify admin, go to Settings → Domains.
- Click your domain, then Domain settings → Edit DNS settings.
- 次をクリックします: Add custom record and choose CNAME.
- Set 名前 to the language code and Points to →
dns2.conveythis.com. - 次をクリックします: Confirm.
For other providers, see Google’s host-specific CNAME instructions.
4. Verify the records
DNS changes can take from a few minutes up to 24 hours to spread. Then go back to Url Structure in your ConveyThis settings and click Test DNS connection. When it shows DNS successfully connected!, you are done.
You can also check a record yourself with the Google Dig tool. Look up es.example.com (with your own domain and language) as CNAME. The answer should end in the ConveyThis server name:
es.example.com. 300 IN CNAME dns2.conveythis.com.Note: If you can’t find your DNS manager or the record doesn’t connect, email us at [電子メールが保護されました] with your domain and the records you added.