
Wie füge ich ConveyThis zu Joomla hinzu?
Die Integration von ConveyThis in Ihre Website ist schnell und einfach, und Joomla bildet da keine Ausnahme. In wenigen Minuten installieren Sie die ConveyThis-Erweiterung, verbinden sie mit Ihrem kostenlosen ConveyThis-Konto und veröffentlichen Ihre erste übersetzte Sprache, ohne Code zu schreiben.
Voraussetzungen: Joomla 4, 5 oder 6 und PHP 8.1 oder neuer. Joomla 3 wird nicht unterstützt.
1) Installieren Sie die ConveyThis-Erweiterung
Gehen Sie in der Joomla-Administration zu System → Install → Extensions und öffnen Sie den Tab Install from Web . Geben Sie ConveyThis in das Suchfeld ein und klicken Sie auf das Ergebnis ConveyThis.
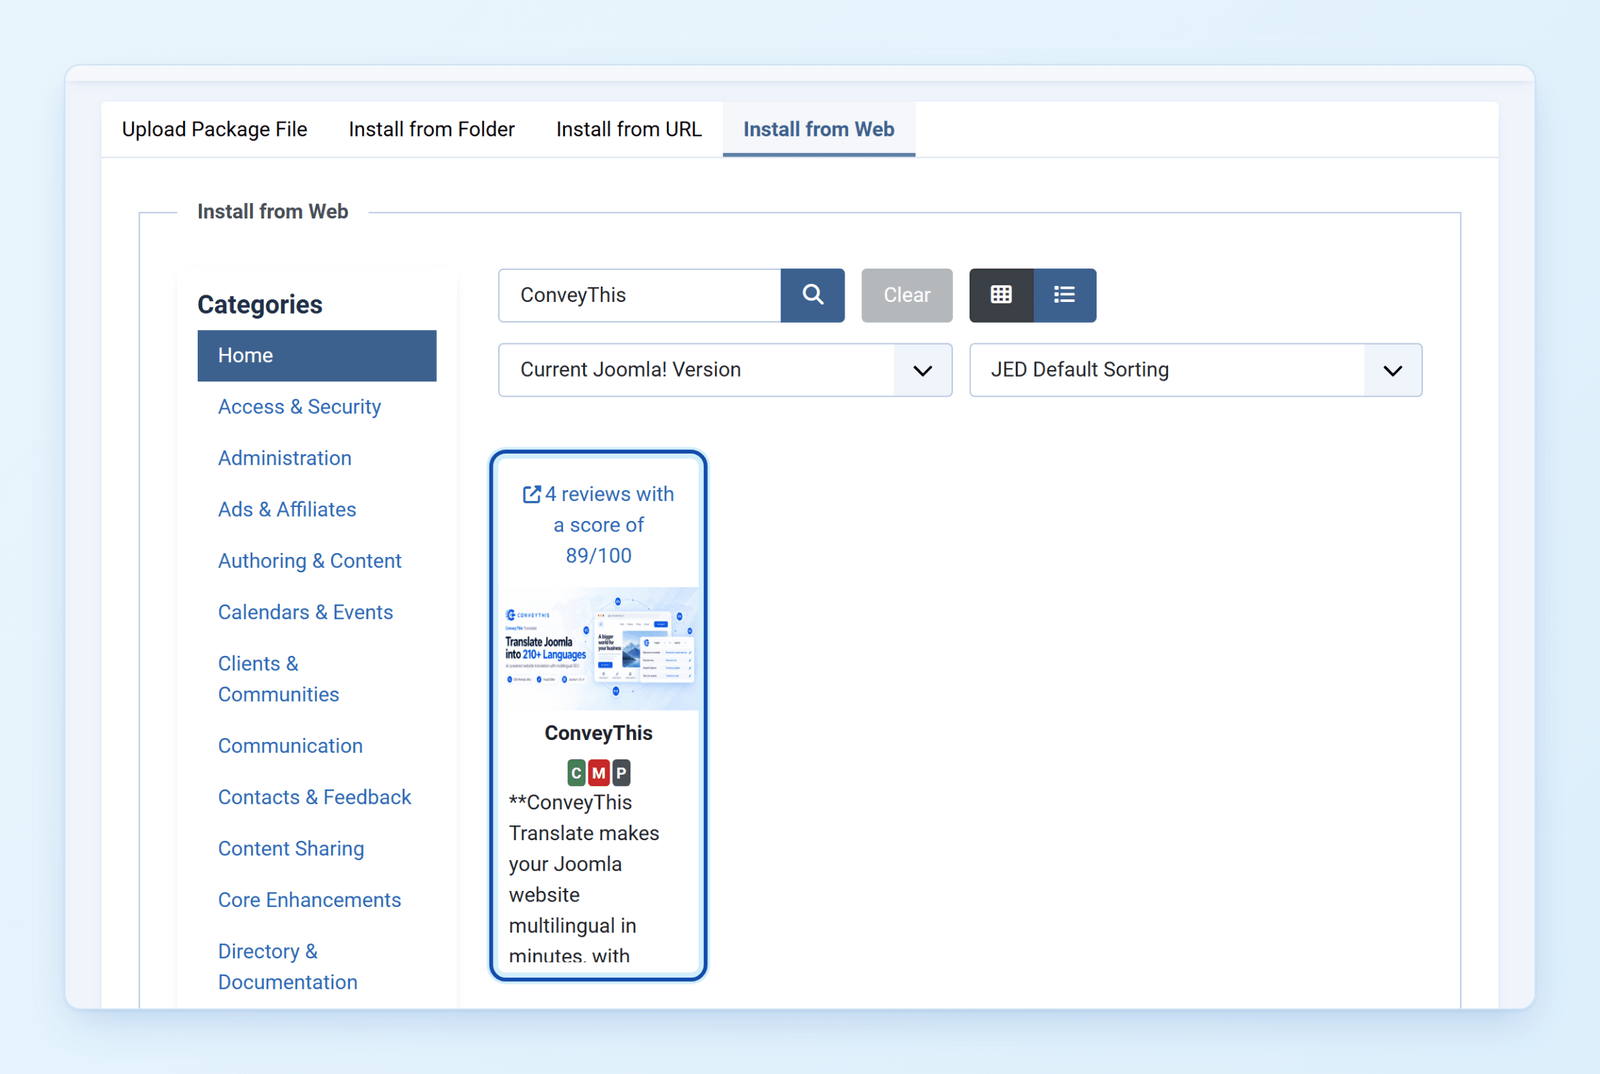
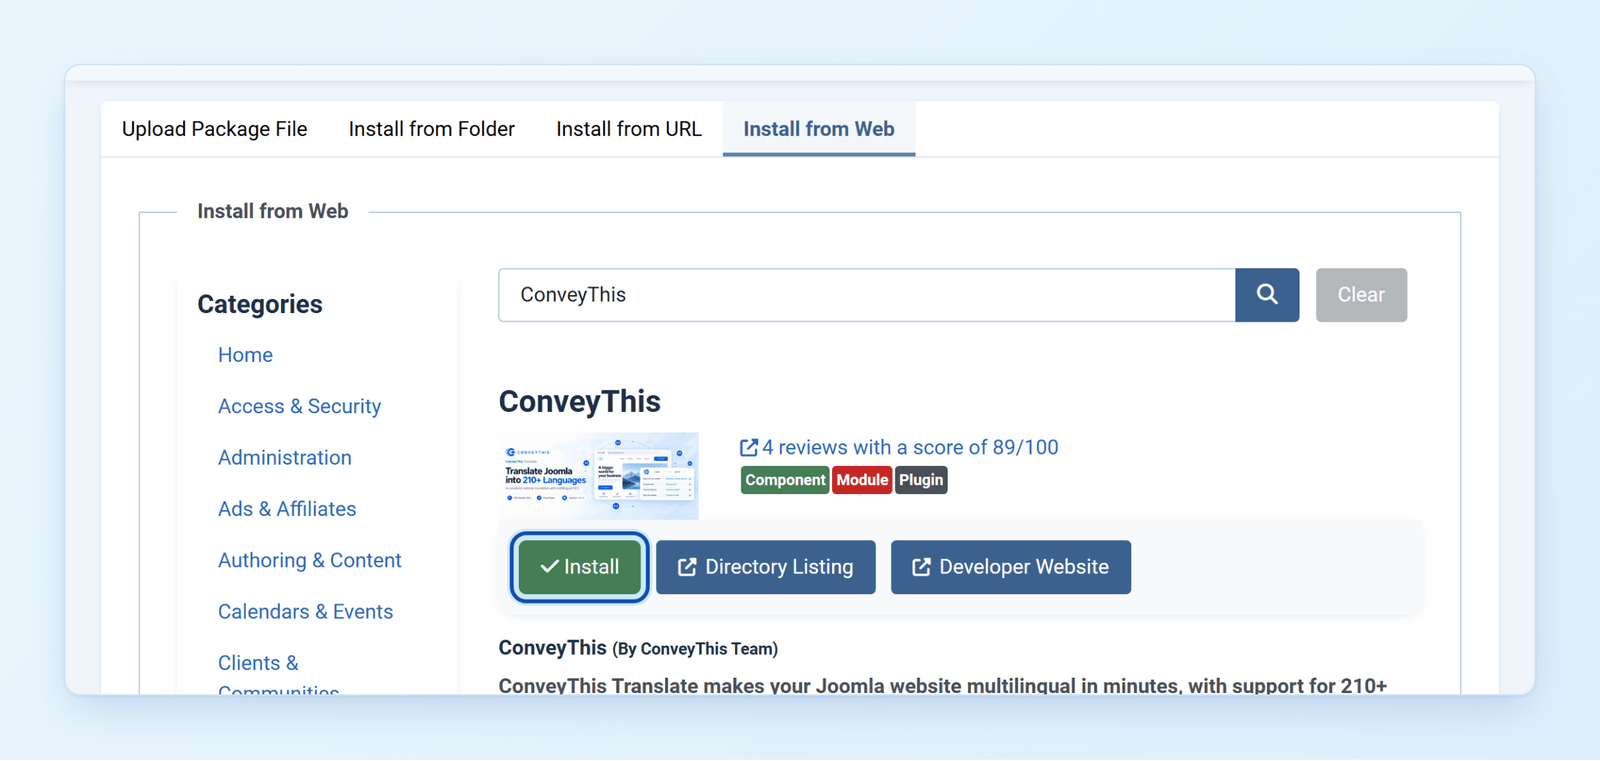
Klicken Sie auf Installieren, und bestätigen Sie dann auf dem nächsten Bildschirm.
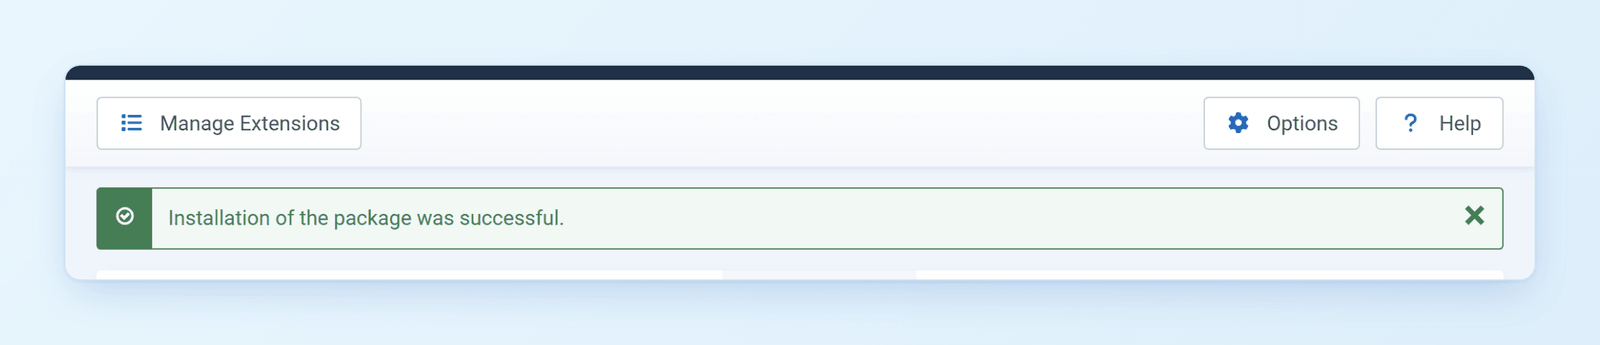
Wenn Joomla meldet: Installation of the package was successful, ist die Erweiterung einsatzbereit.
Möchten Sie die Datei lieber selbst hochladen? Laden Sie conveythis.zip herunter und ziehen Sie die Datei auf den Tab Upload Package File auf derselben Seite.
2) Öffnen Sie ConveyThis in Joomla
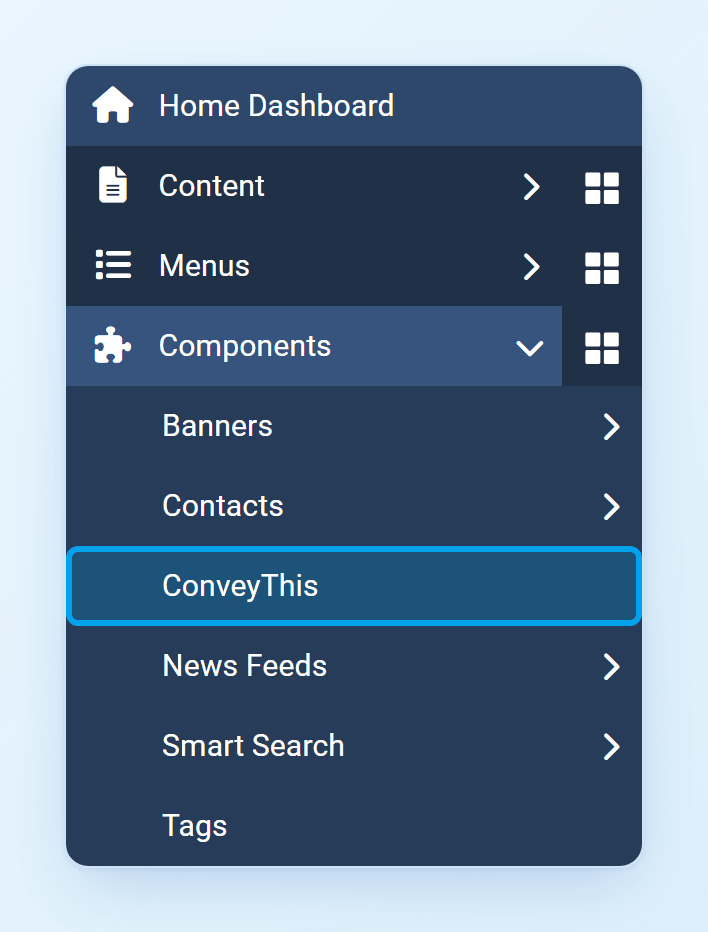
Gehen Sie zu Components → ConveyThis.
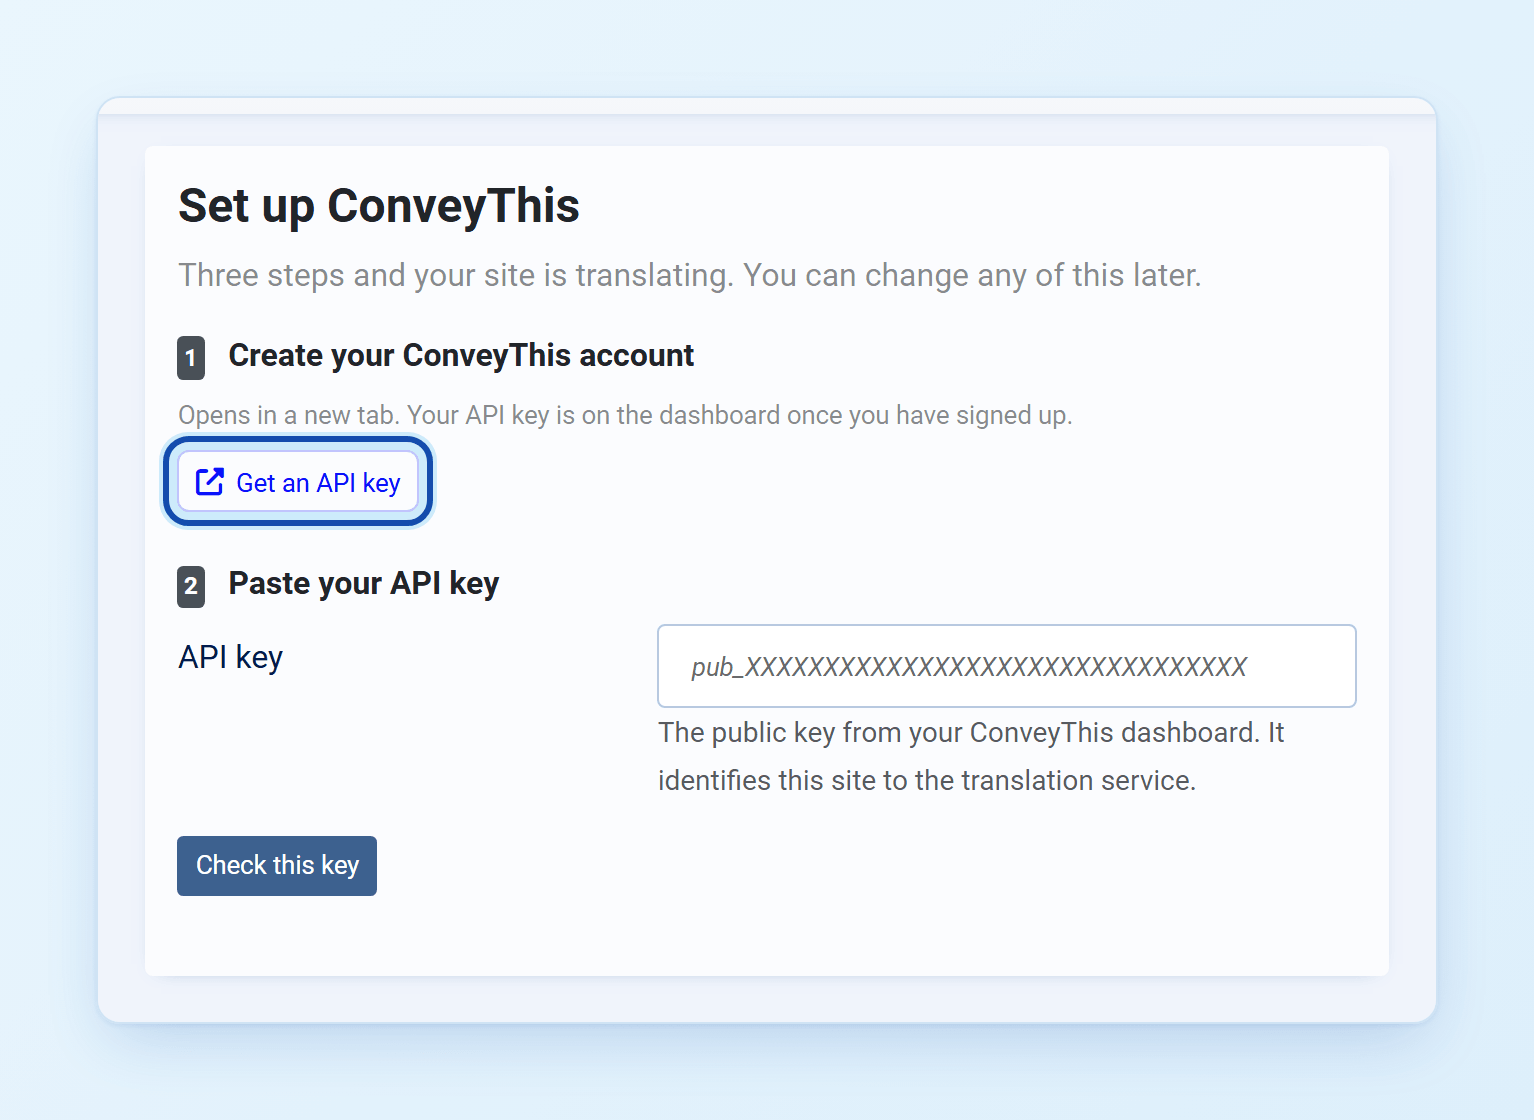
Beim ersten Öffnen zeigt ConveyThis ein kurzes Setup: Erstellen Sie ein Konto, fügen Sie Ihren API-Schlüssel ein, bestätigen Sie Ihre Sprachen.
3) Erstellen Sie Ihr kostenloses ConveyThis-Konto
Klicken Sie auf Get an API key. Die Registrierungsseite von ConveyThis öffnet sich in einem neuen Tab. Erstellen Sie Ihr Konto (keine Kreditkarte erforderlich) und bestätigen Sie Ihre E-Mail-Adresse.
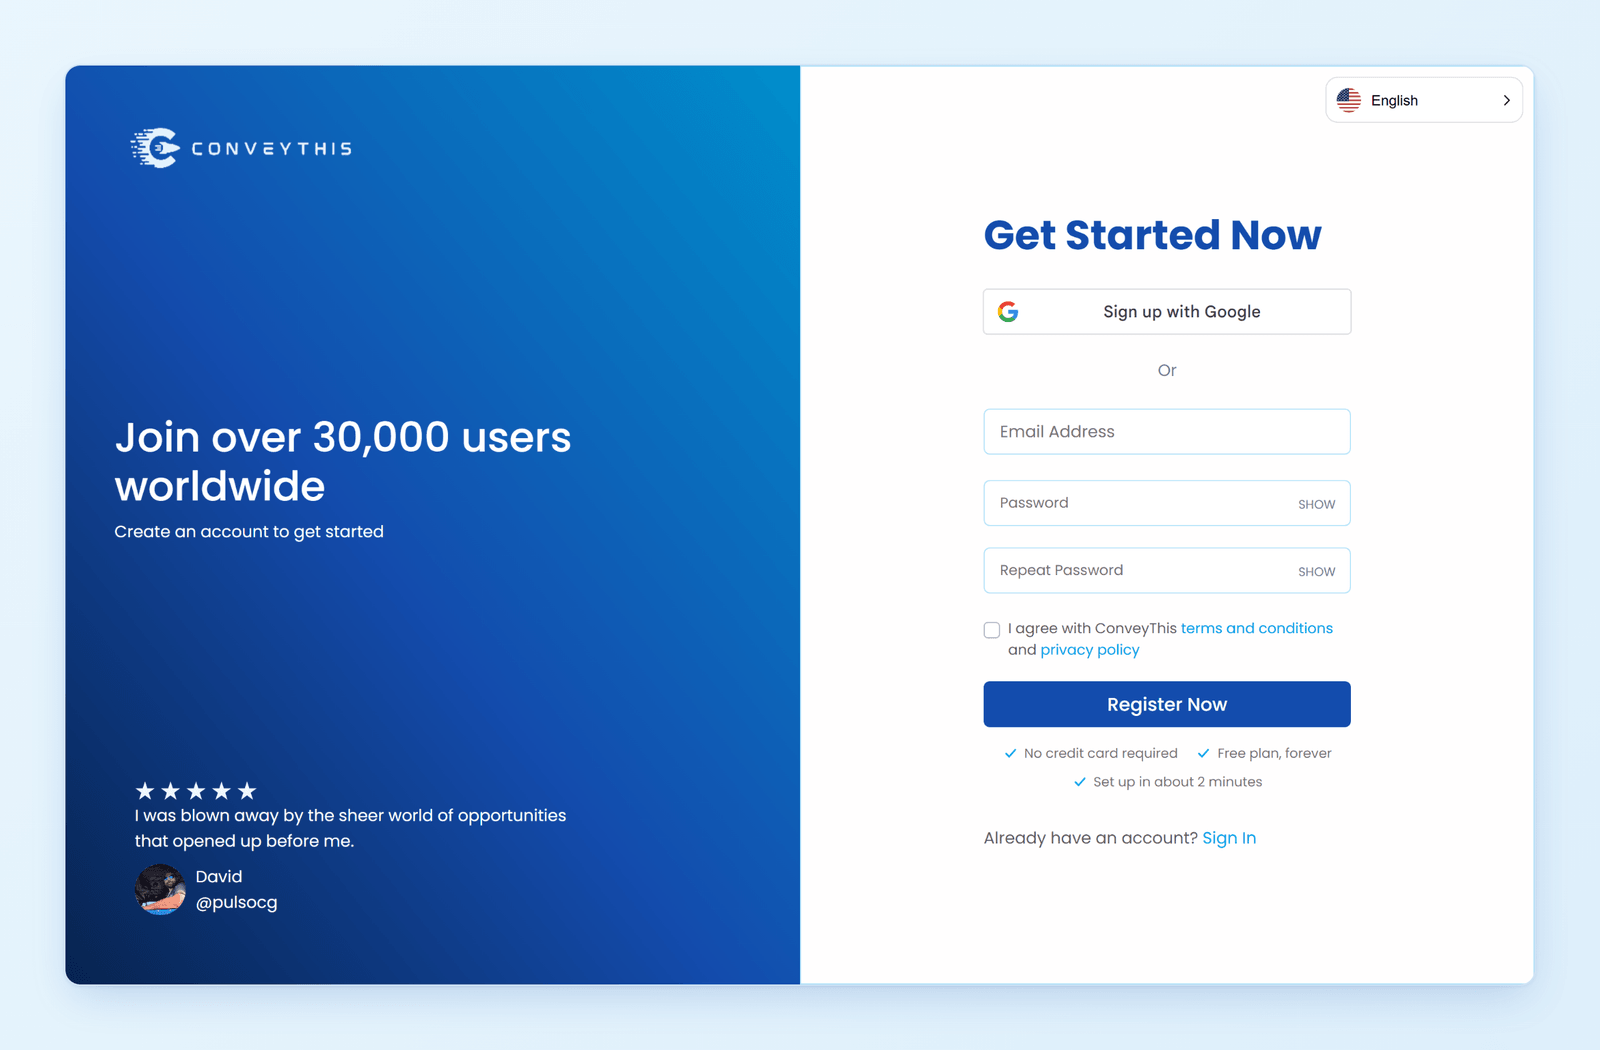
Folgen Sie dann der kurzen Einrichtung: Wählen Sie Joomla als Website-Technologie, falls Sie danach gefragt werden, bestätigen Sie Ihre Domain und wählen Sie die Sprache Ihrer Website sowie die Sprachen, die Sie hinzufügen möchten. Nach der Einrichtung wird Ihr API-Schlüssel im Dashboard angezeigt. Er sieht so aus: pub_xxxxxxxxxxxxxxxx.
4) Fügen Sie Ihren API-Schlüssel ein und beginnen Sie mit der Übersetzung
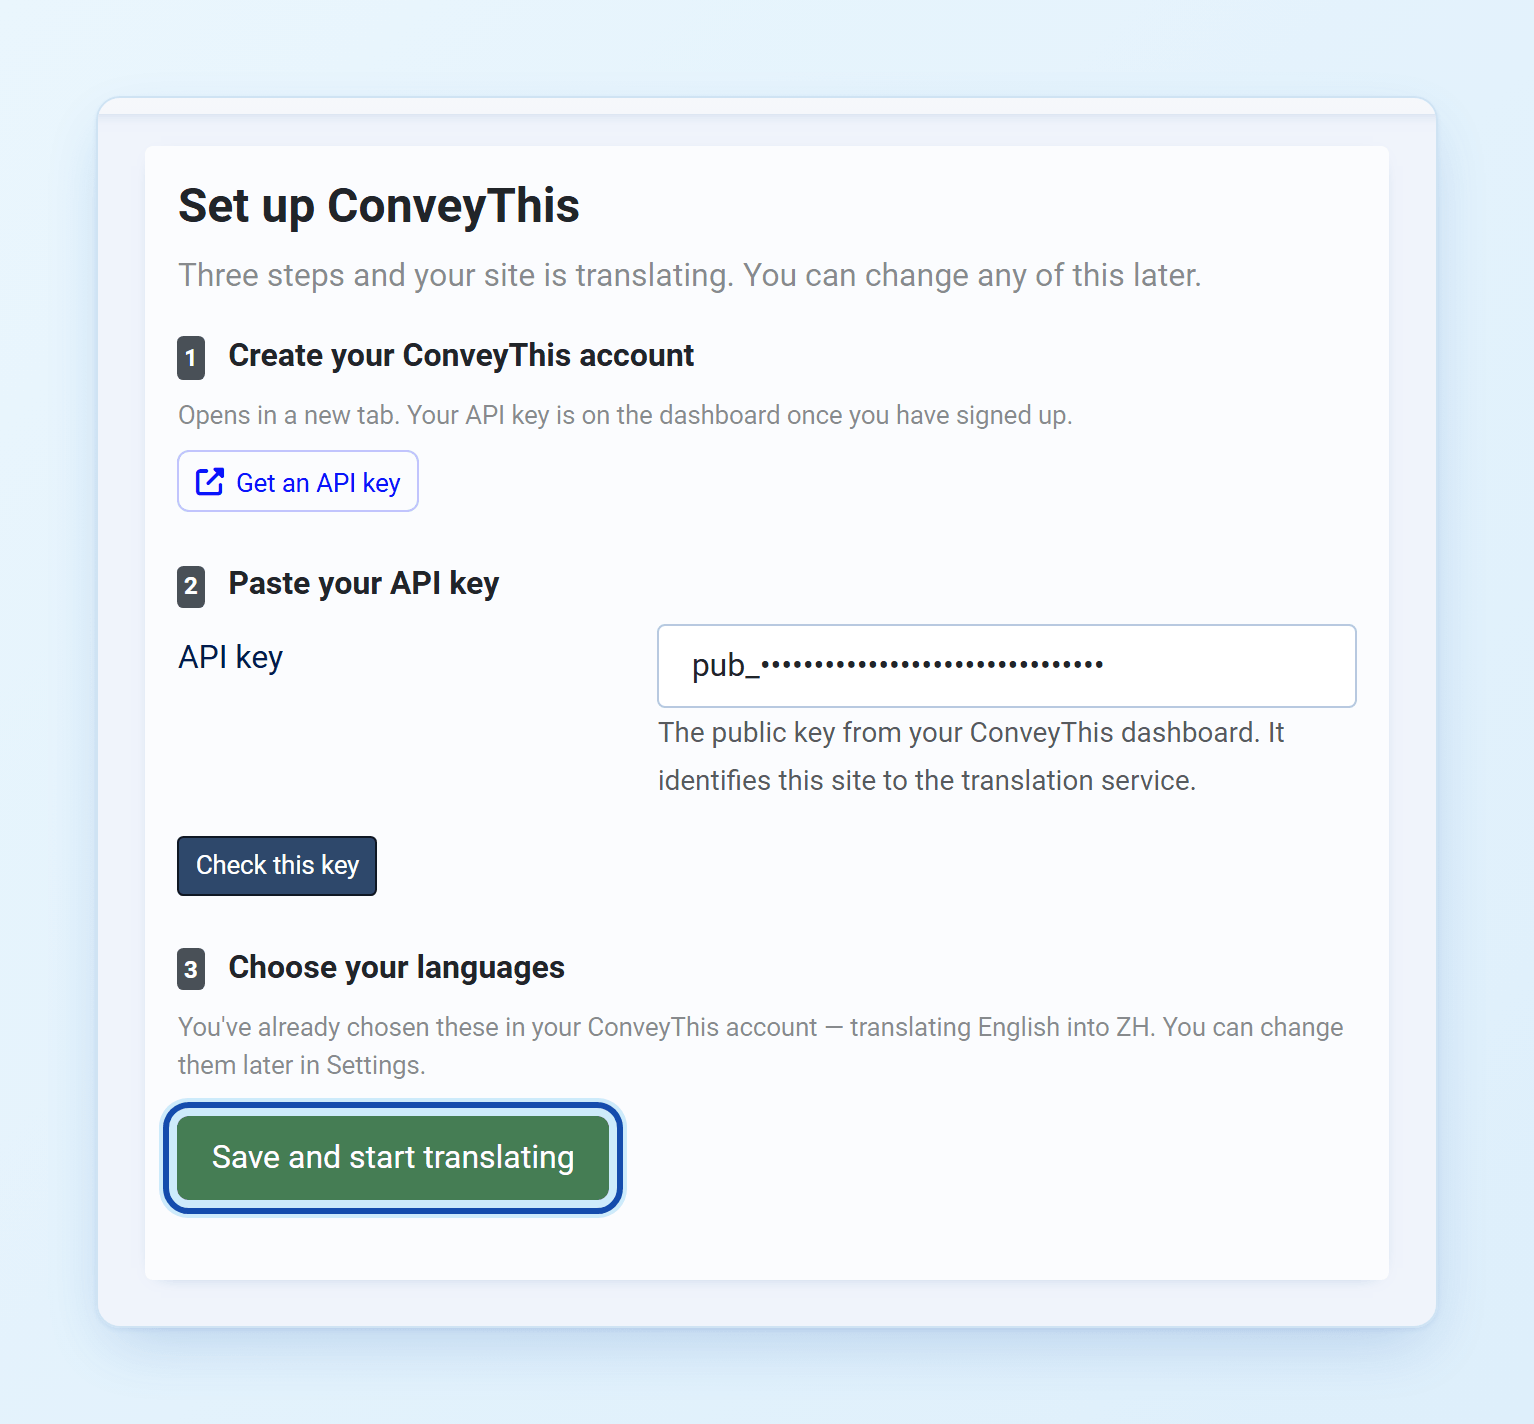
Wechseln Sie zurück zum Joomla-Tab, fügen Sie den API-Schlüssel ein und klicken Sie auf Check this key. ConveyThis übernimmt die Sprachen, die Sie in Ihrem Konto ausgewählt haben, sodass Sie sie nicht zweimal auswählen müssen. Klicken Sie auf Save and start translating.
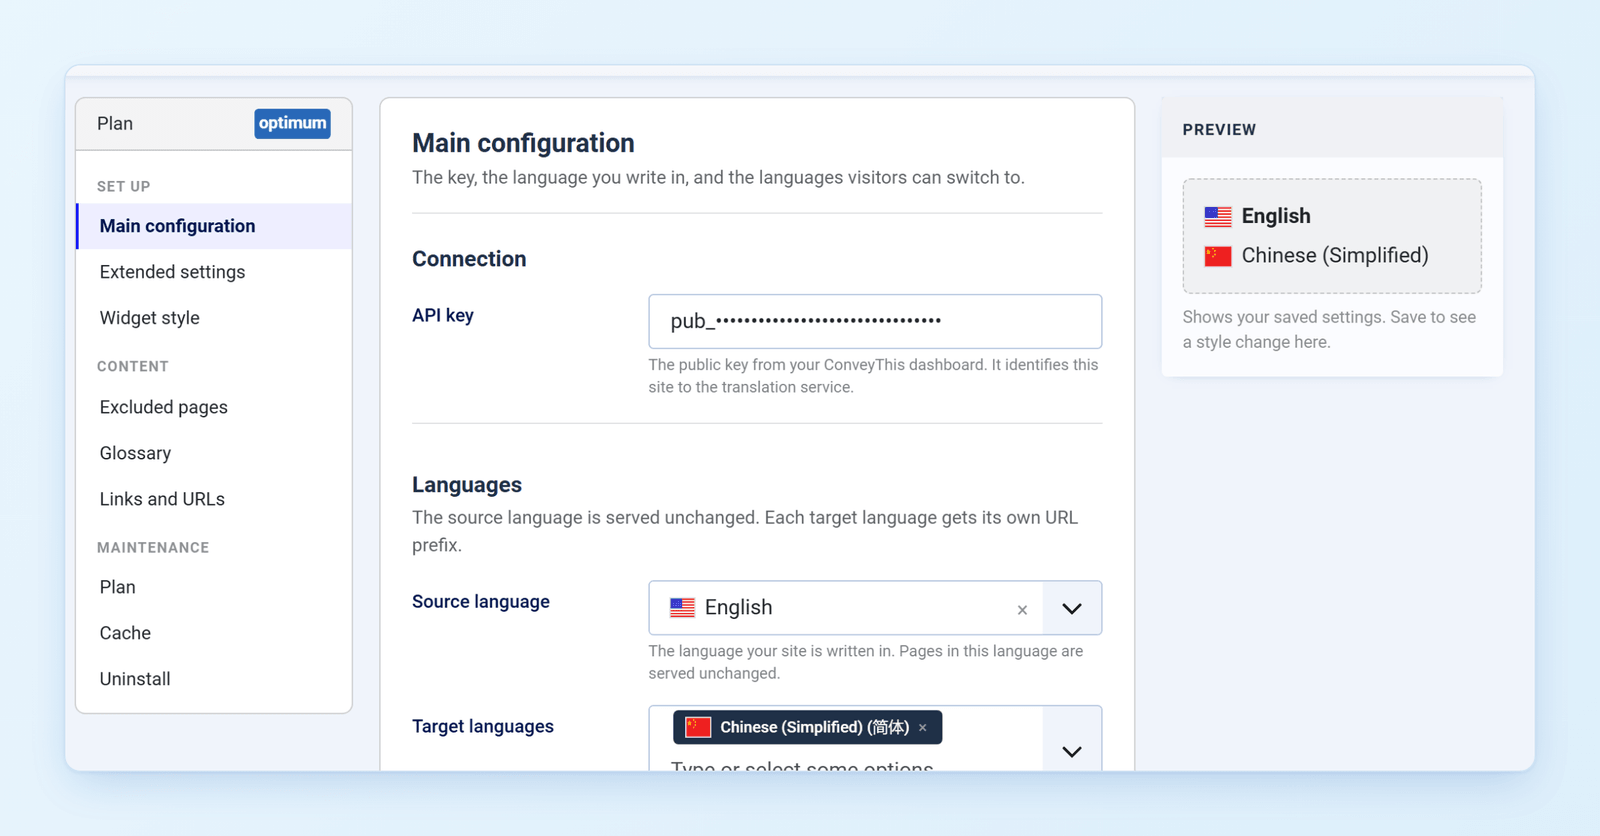
Sie gelangen zu den ConveyThis-Einstellungen. Hier können Sie die Sprachen jederzeit ändern. Den Sprachumschalter gestalten Sie unter Widget style.
5) Aktivieren Sie „URL Rewriting“ in der Global Configuration
Jede Sprache erhält ihre eigene URL, wie zum Beispiel /es/about. Damit diese URLs funktionieren, gehen Sie zu System → Global Configuration, und setzen Sie im Abschnitt SEO die Option Use URL Rewriting → Ja, dann klicken Sie auf Speichern. Ohne diese Einstellung können übersetzte Seiten einen 404-Fehler zurückgeben.
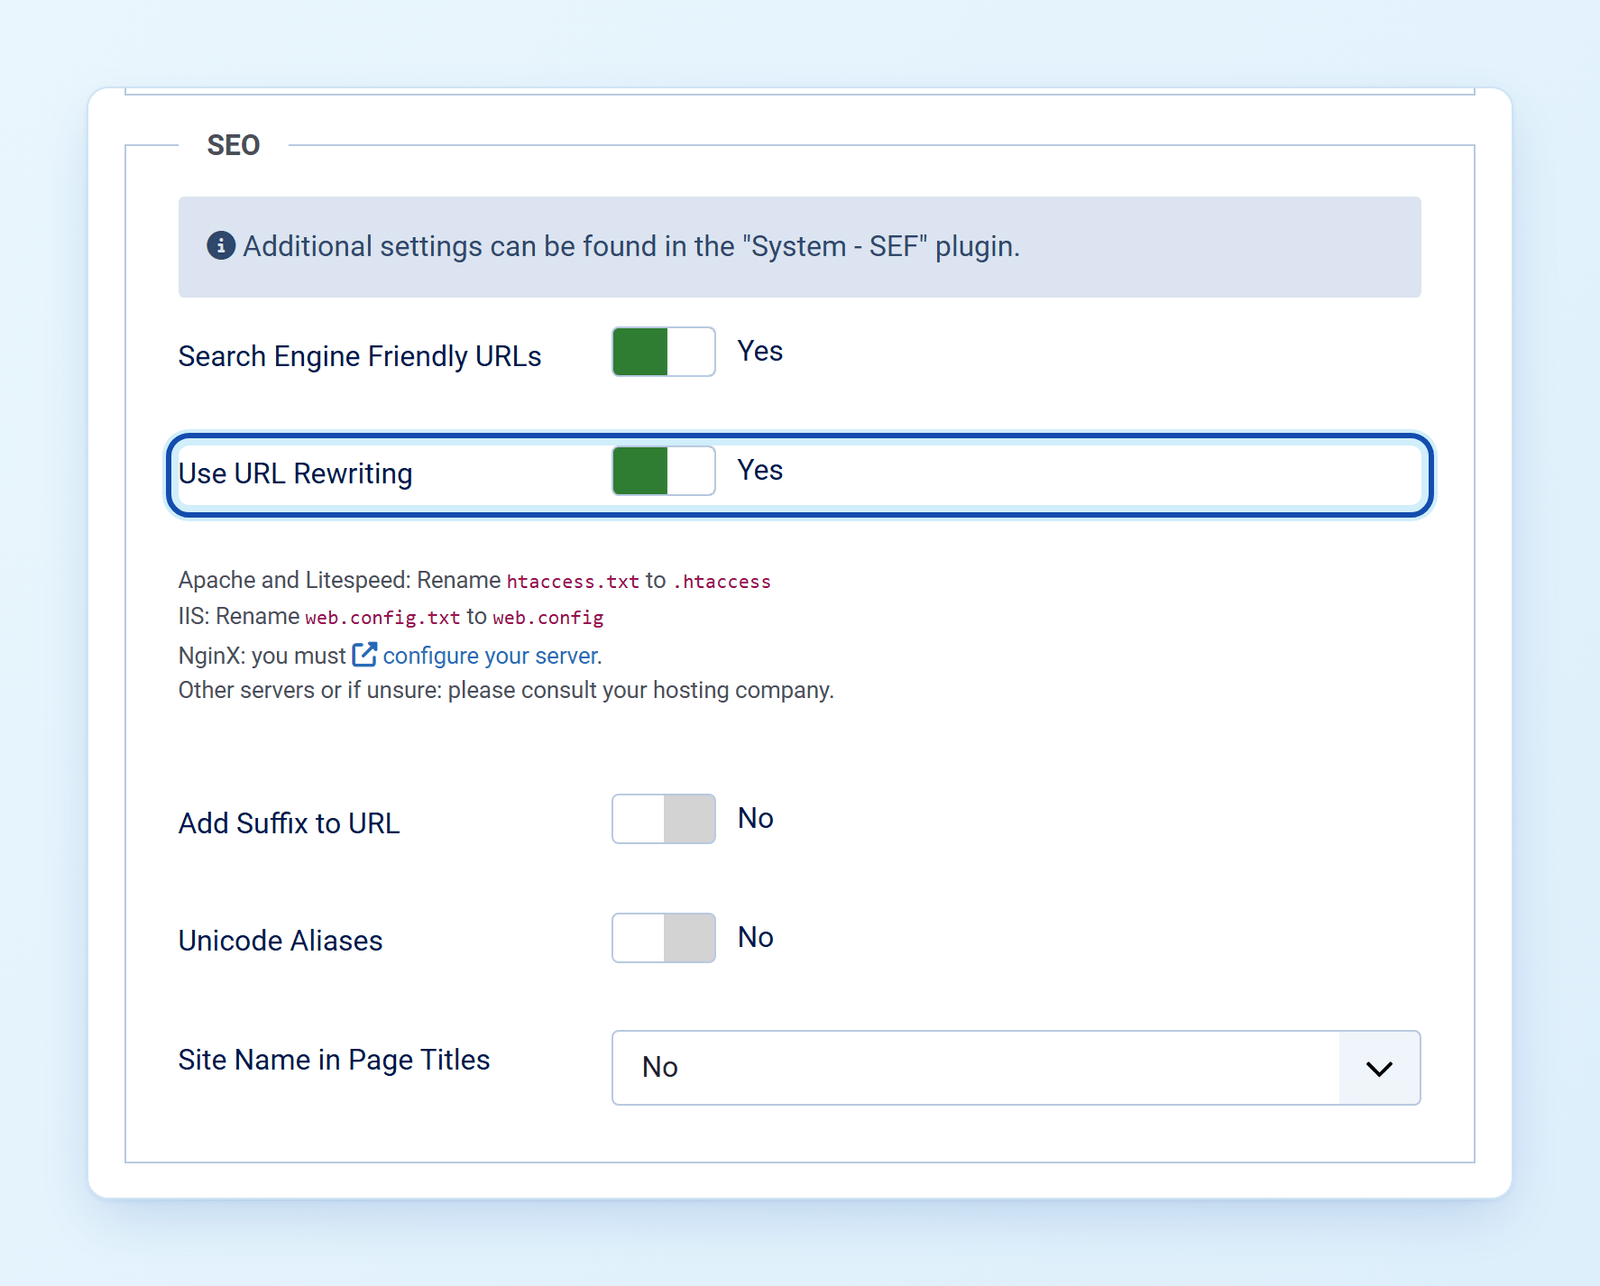
Abhängig von Ihrem Hosting:
- Apache und LiteSpeed: ändern Sie den Dateinamen von
htaccess.txt→.htaccessin Ihrem Joomla-Stammordner. - IIS: ändern Sie den Dateinamen von
web.config.txt→web.config. - NGINX: Sie müssen Ihren Server konfigurieren.
- Andere Server oder wenn unsicher: Wenden Sie sich an Ihren Hosting-Anbieter.
Nutzen Sie den Language Filter von Joomla? Deaktivieren Sie ihn. Das Joomla-Plugin Language Filter verwendet dieselben Sprachpräfixe in der URL (/es/), daher kommt es zu Konflikten. ConveyThis erkennt das und bietet an, ihn für Sie zu deaktivieren.
6) Fertig!
Das war's. Öffnen Sie Ihre Website: Der Sprachumschalter erscheint unten rechts. Beim ersten Mal kann es ein bis zwei Minuten dauern, bis er angezeigt wird.
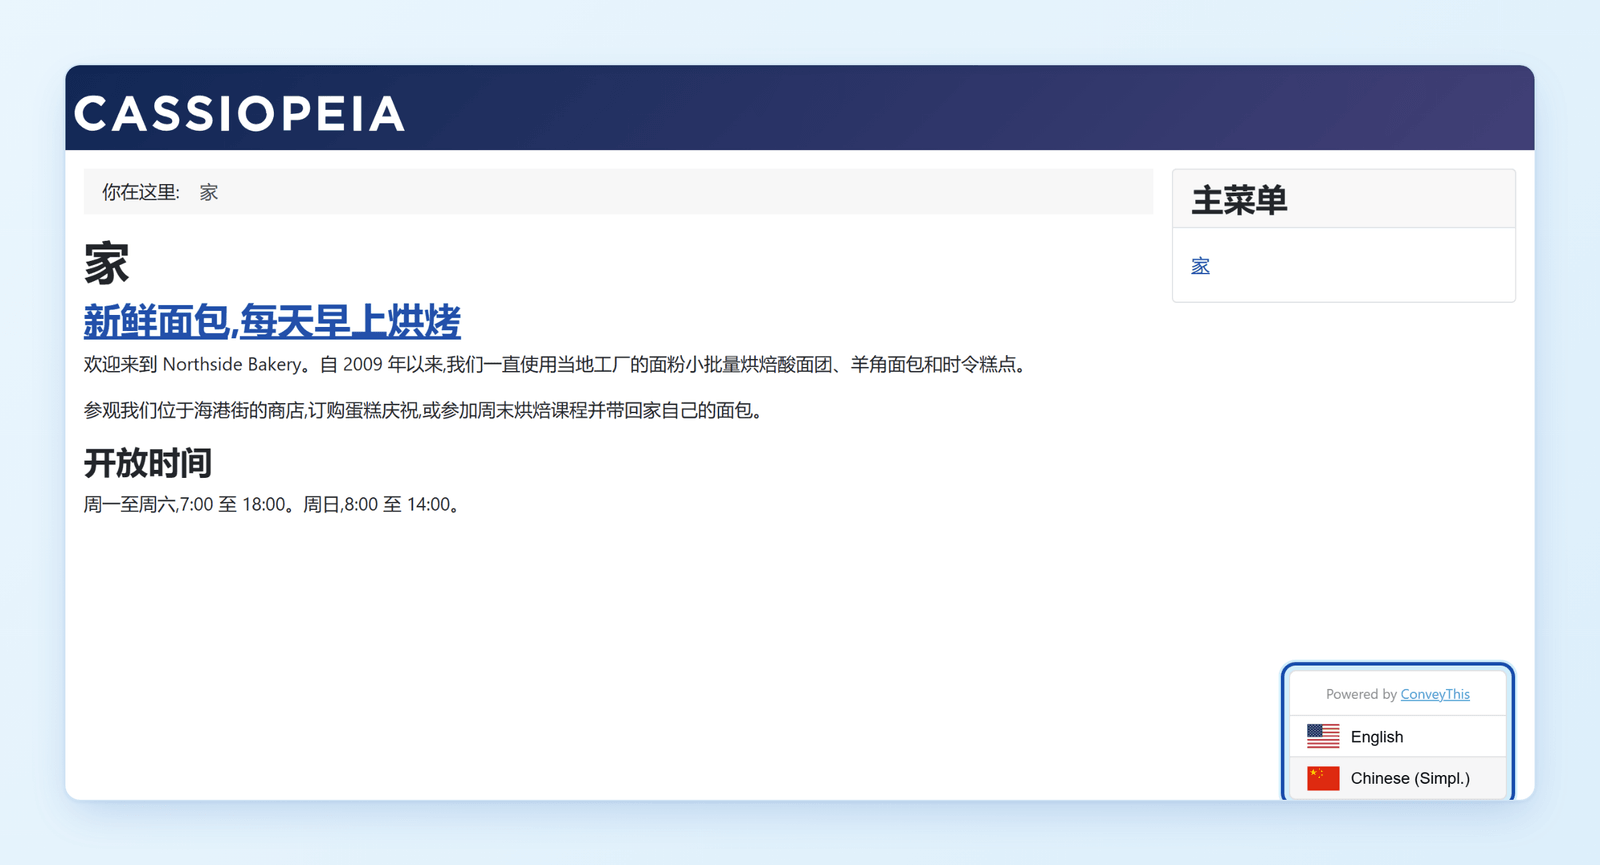
Wechseln Sie die Sprache und Ihre Website ist mehrsprachig. Um Übersetzungen zu überprüfen oder zu bearbeiten, klicken Sie auf Edit Translations in Ihrem ConveyThis Dashboard und wählen Sie Ihre Website aus oder verwenden Sie den visuellen Editor, um sie direkt auf Ihren Seiten zu bearbeiten.
Herzlichen Glückwunsch, jetzt können Sie mit der Übersetzung Ihrer Website beginnen!