
How do I import and export translations?
Importing translations (free on all plans)
Translation import is included on every ConveyThis plan, including the Free plan. There are no per-import fees.
Use it when you are switching from Weglot, Bablic or another tool and want to keep translations you have already paid for. You can also import CSV or TMX files from any compatible source.
Step 1. Open the import page
- Log in to your ConveyThis dashboard.
- Go to the Domains page.
- On your website, open the Translations menu and select CSV/TMX.
You will land on the Import translations page for that website.
Step 2. Upload a CSV or TMX file
On the Import translations form:
- Choose your Source Language (the original language of your content).
- Choose your New Language(s) (the language you imported translations for).
- Click Browse… and select a CSV or TMX file.
- Click UPLOAD.

Tip: For the best match, let ConveyThis scan your site first so your pages are indexed. Imported strings are then applied to matching content on your website.
CSV file format
A ConveyThis CSV file has two columns, with one translation per row:
- Column 1: source text (original language)
- Column 2: translated text (target language)
Example:
House,Casa
Try ConveyThis,Prueba ConveyThis
Contact us,ContáctanosYou can also download sample CSV and TMX files from the links at the bottom of the import page in your dashboard.
Importing from Weglot
If you exported a CSV from Weglot, use the Import Weglot Translations section on the same page. ConveyThis converts the Weglot file format automatically, with no manual editing needed.
- Select the Source Language and New Language(s).
- Click Browse… and choose your Weglot CSV export.
- Review the Conversion Preview (ConveyThis maps Weglot columns to the ConveyThis format).
- Click CONVERT & UPLOAD.

The same import page also accepts standard CSV and TMX files from Bablic and other translation tools. Upload them in the Import translations section above.
Step 3. View imported language pairs
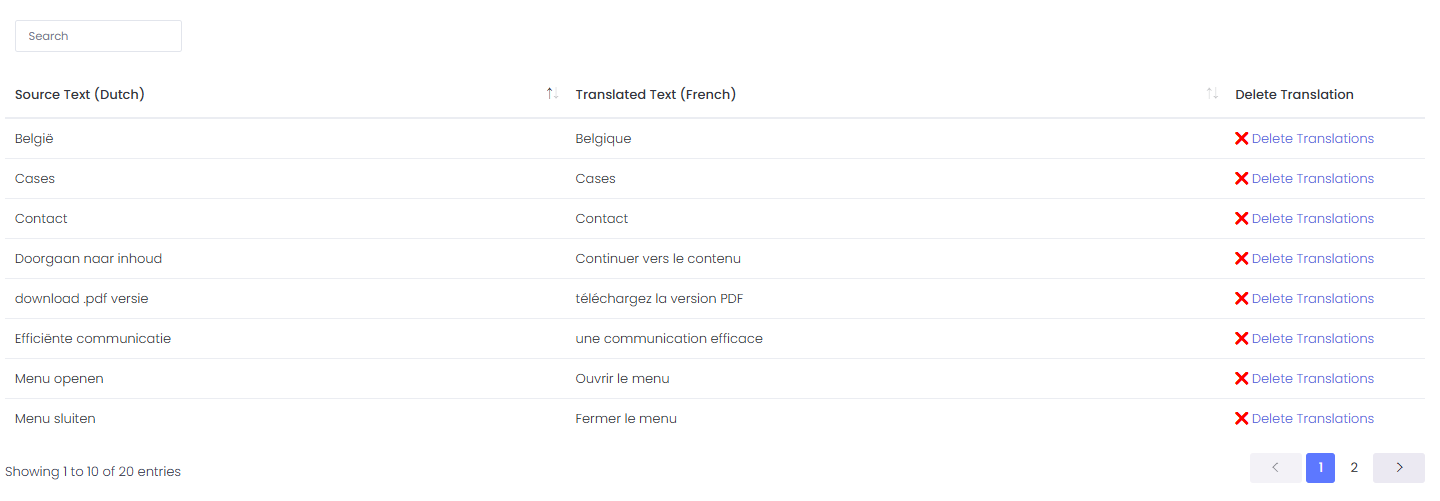
After a successful import, your language pairs appear in the table below the upload forms. Each row shows the source language, target language, and links to edit or delete that import package.

Step 4. Review and edit imported strings
Click Edit Translations on any row to open the full list of imported strings. Search, review, and delete individual entries as needed.
Exporting translations (Pro+ and higher)
Exporting translations requires a Pro+ plan or higher. On a lower plan, the export options show “(Upgrade your plan)” and link to the plans page.
Go to the Domains page, open the Translations menu on your website and select CSV or TMX. You get a ZIP file named after your website, with one file for each language pair (for example example.com_en_es.csv).
Importing and exporting the Glossary
Glossary import and export are available on all paid plans. They aren’t included in the Free plan.
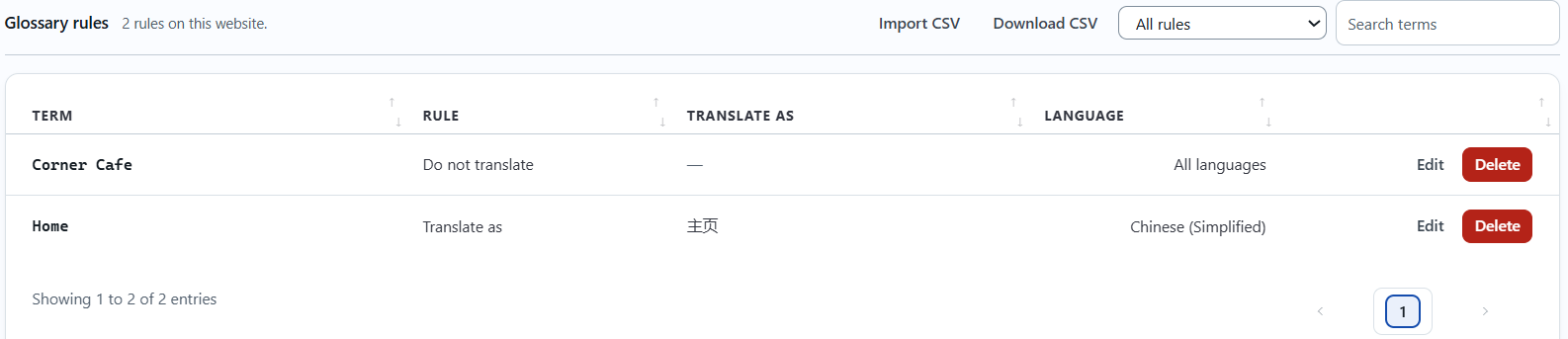
Go to the Domains page, open the Customize menu on your website and choose Glossary. Under Glossary rules:
- Click Download CSV to export your glossary.
- Click Import CSV to add rules from a file. The import page explains the four columns (
rule,source_text,translate_text,target_language) and has a sample file you can download.
For more about Glossary rules, see How to Use the ConveyThis Glossary.