
How to Use the ConveyThis Glossary
The ConveyThis Glossary lets you control how specific words and phrases are translated on your website. Use glossary rules to keep brand names and product names untranslated, or to make sure important terms are always translated the same way.
The Glossary is available on all paid ConveyThis plans. It isn’t included in the Free plan.
What can a Glossary rule do?
Each rule is for one term and has one of two settings:
- Do not translate keeps the term exactly as written. Use it for your brand name, for example “ConveyThis” stays “ConveyThis” in every language.
- Translate as always uses the translation you enter. For example, “Home” is always translated as “Accueil” in French.
A rule can apply to all your languages or to one language only. Rules apply to every page of your website, both when the term stands alone and when it appears inside a sentence.
How do I add a Glossary rule?
- Log in to your ConveyThis dashboard and open Domains.
- On your website, open the Customize menu and choose Glossary. You can also open it from the Glossary link at the top of your Translations list.
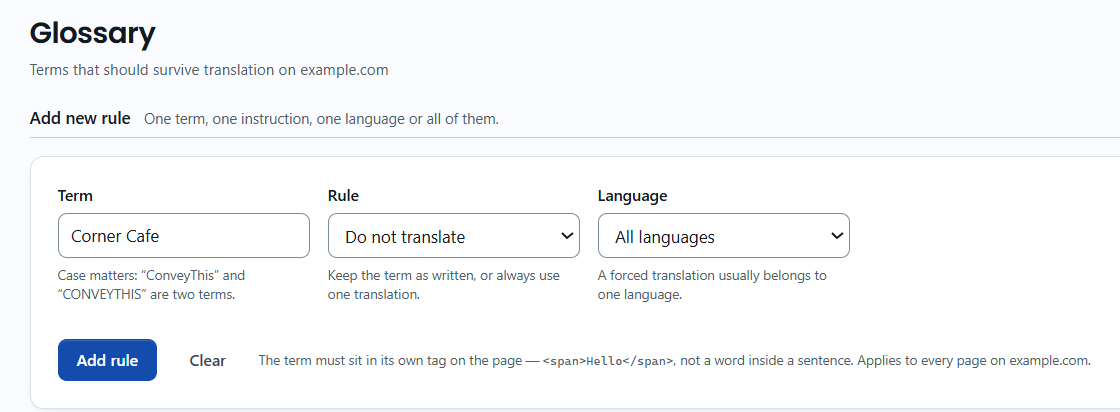
- Under Add new rule, fill in the form:
- Term: the word or phrase exactly as it appears on your pages.
- Rule: Do not translate or Translate as.
- Language: All languages, or one language.
- Translate as: the translation to use. Only needed for the Translate as rule.
- Click Add rule.
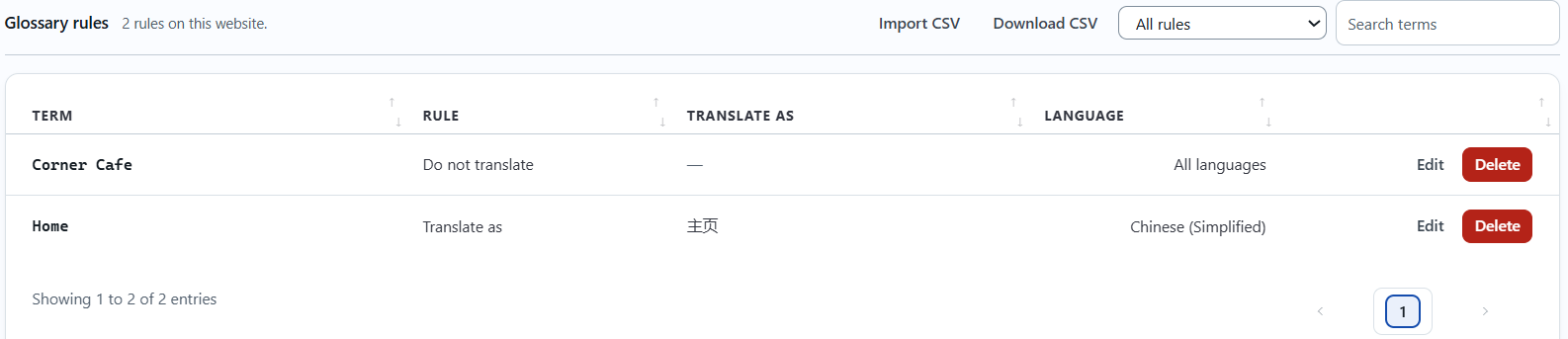
Your new rule appears under Glossary rules, where you can edit or delete it later. In the example below, “Corner Cafe” is never translated, and “Home” is always translated as “主页” on the Chinese version of the site.
Can I add rules in WordPress or Shopify?
Yes. The ConveyThis plugin for WordPress and the ConveyThis app for Shopify show the same Glossary as your dashboard. A rule you add in one place appears in the others.
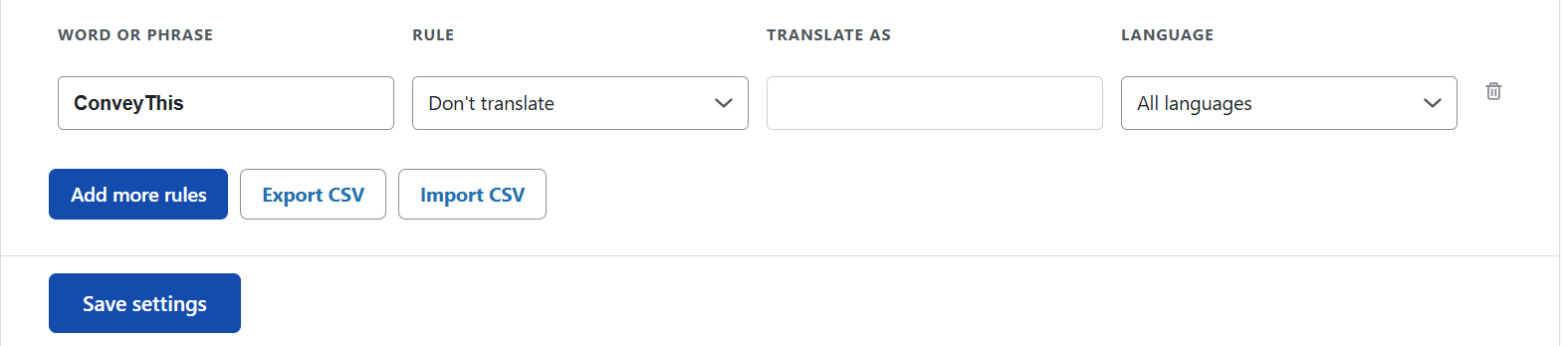
WordPress: in your WordPress admin, open ConveyThis and go to the Glossary tab. Click Add more rules, fill in the row and click Save settings.
Shopify: in your Shopify admin, open the ConveyThis app and go to Glossary. Fill in Add new rule and click Add rule. The rule is saved right away.

How are terms matched?
- Case matters. “ConveyThis” and “CONVEYTHIS” are two different terms. Add a rule for each spelling you use.
- Whole words only. A rule for “Pro” doesn’t change “Professional”.
- Text inside HTML attributes isn’t changed, for example a term inside a link address.
What happens to existing translations?
When you add or change a rule, ConveyThis translates the texts that contain the term again, using the rule. You’ll see the result the next time the page is opened in that language.
Only machine translations are translated again. Texts you edited by hand, and professional translations, are kept as they are. If one of them should use the new term too, edit it yourself. See How do I edit my translations?
Can I add many rules at once?
Yes. On the Glossary page, click Import CSV and upload a file with four columns:
| Column | What to put in it |
|---|---|
| rule | prevent for Do not translate, replace for Translate as |
| source_text | The term as it appears on your site |
| translate_text | The translation. For prevent, use the same text as the term |
| target_language | A language code such as fr or es, or all |
The import page has a sample file you can download. Rows that are invalid or duplicates (same term and language) are skipped.
To back up your rules, click Download CSV.