Localhost Integration
For developers, utilizing localhost is a critical aspect of their workflow, particularly when working on web applications or programs that rely on an internet connection. As part of the development process, developers conduct tests to verify the functionality of their applications on localhost. By establishing a loopback connection to the localhost, they can test the application on the computer and operating system they are presently using.
You can use our ConveyThis plugin on localhost too. In the plugin settings instead of URL or IP you may use “localhost” for testing plugin. Following the steps below!
1) Create a Host and an Account
Although we cannot add new domain as “localhost”, a virtual host will help you. Create a virtual host first and install ConveyThis.
To do that, first of all you need to create account at www.conveythis.com if you haven’t already.
To start of, your ConveyThis account dashboard lets you view and manage all your translations. Simply create a ConveyThis account here.

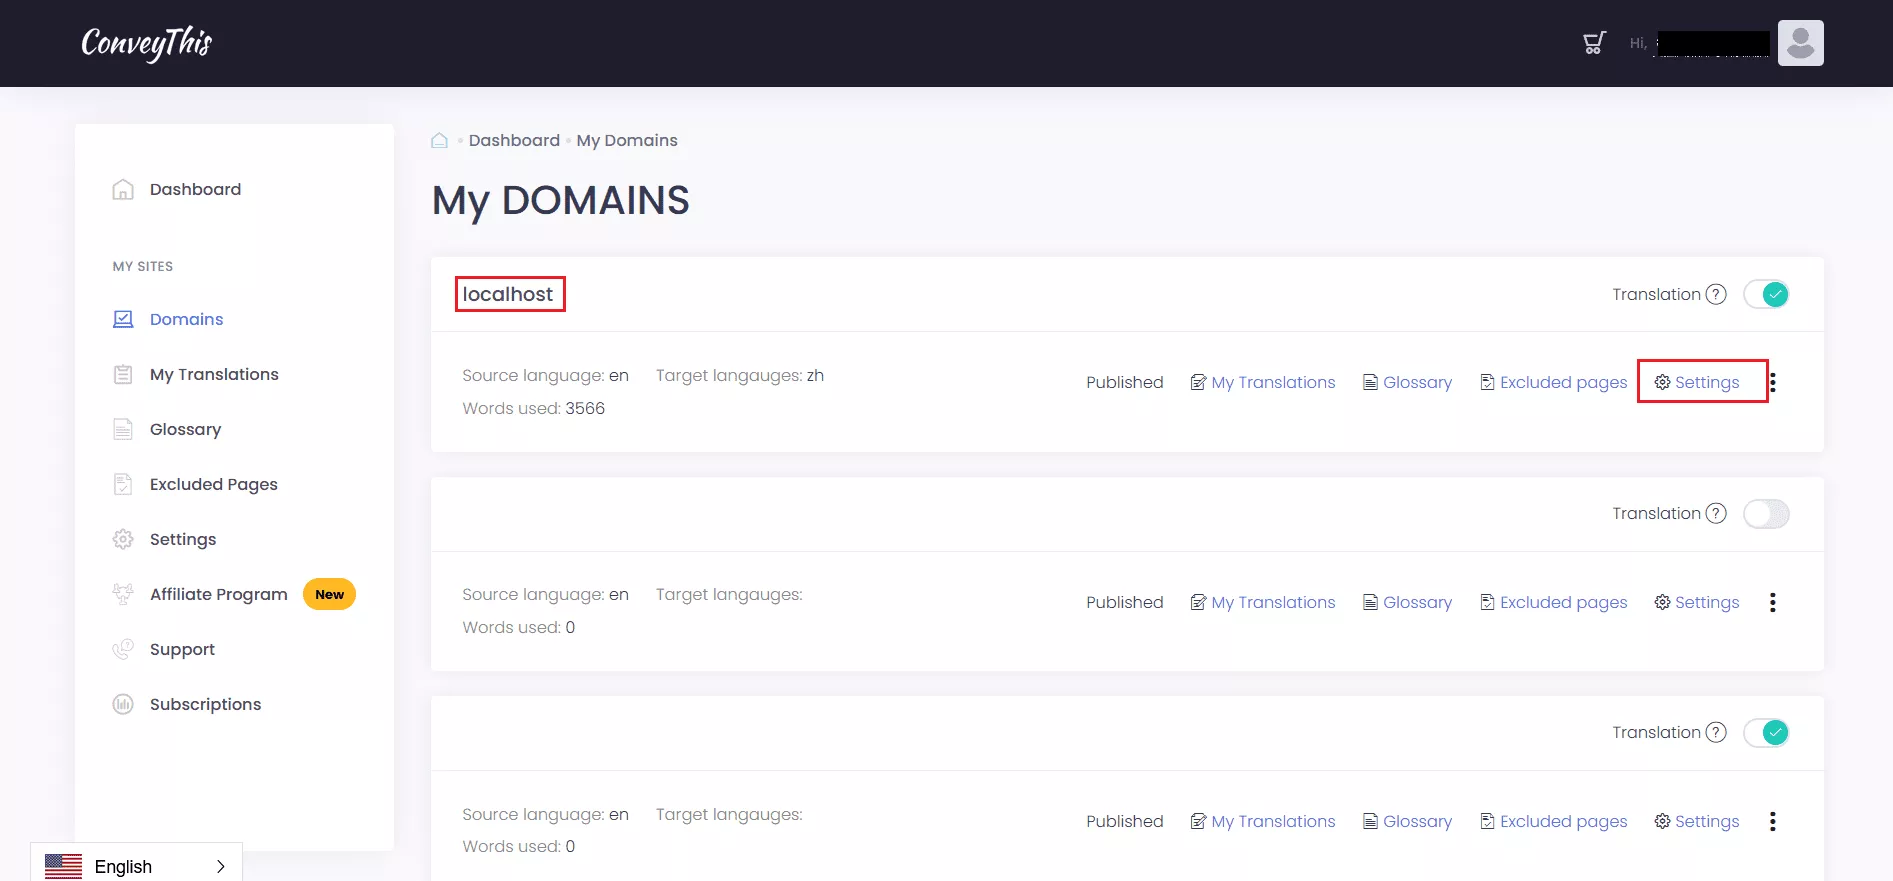
Open settings in your account on conveythis.com and find “localhost” in domains.
Click “Settings” to configurate your settings.

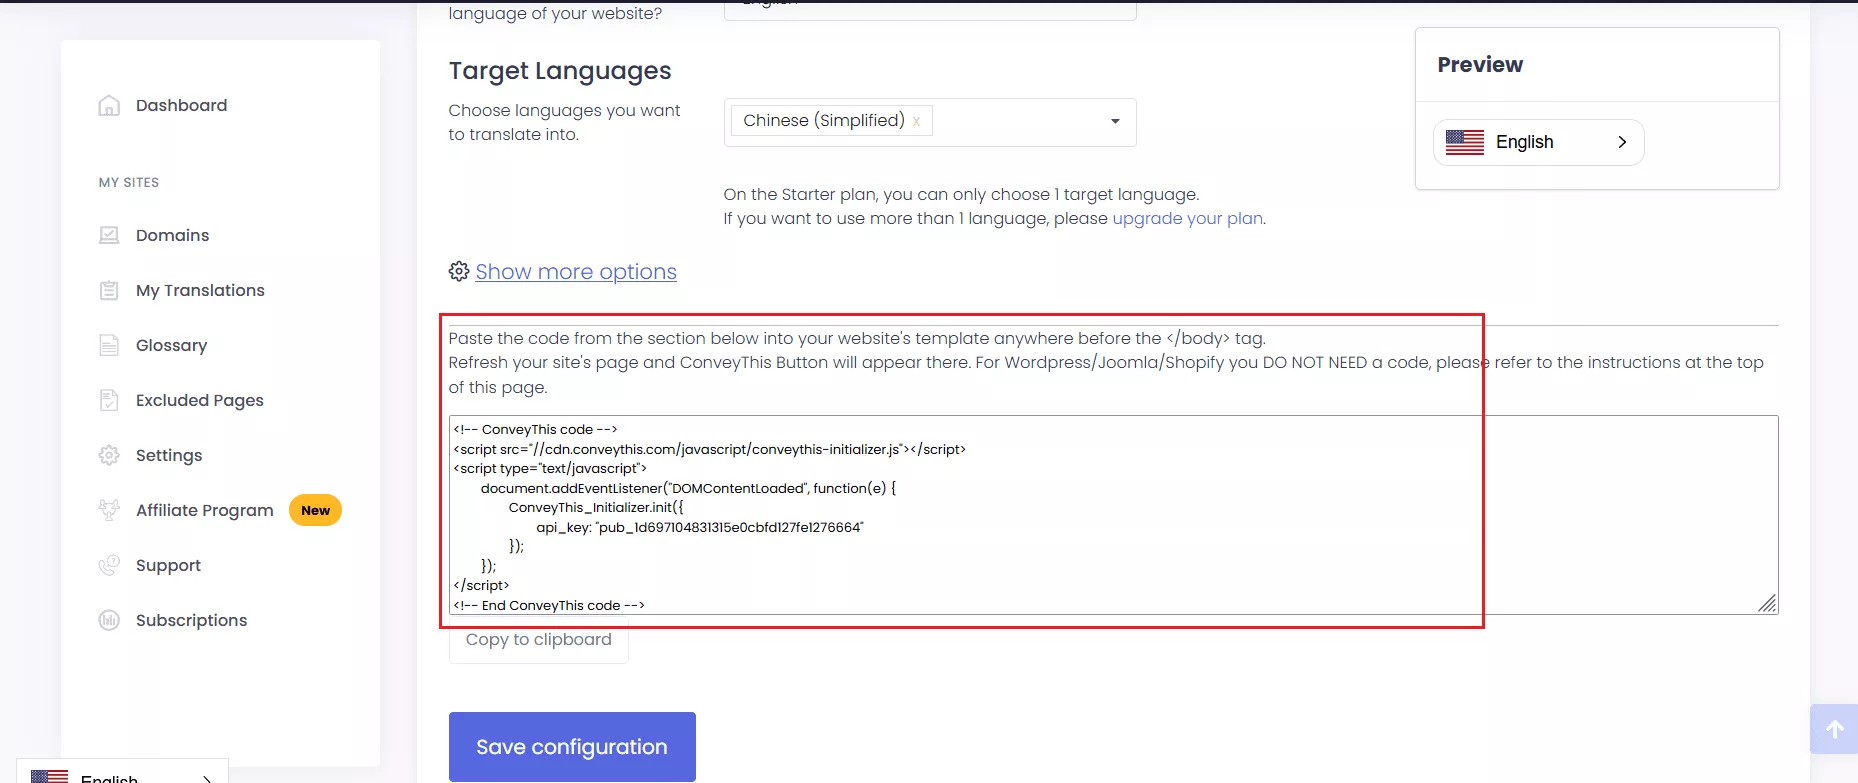
Scroll down and follow the instructions to add ConveyThis code in your localhost website.
Remember to add your own website pages to virtual host file.

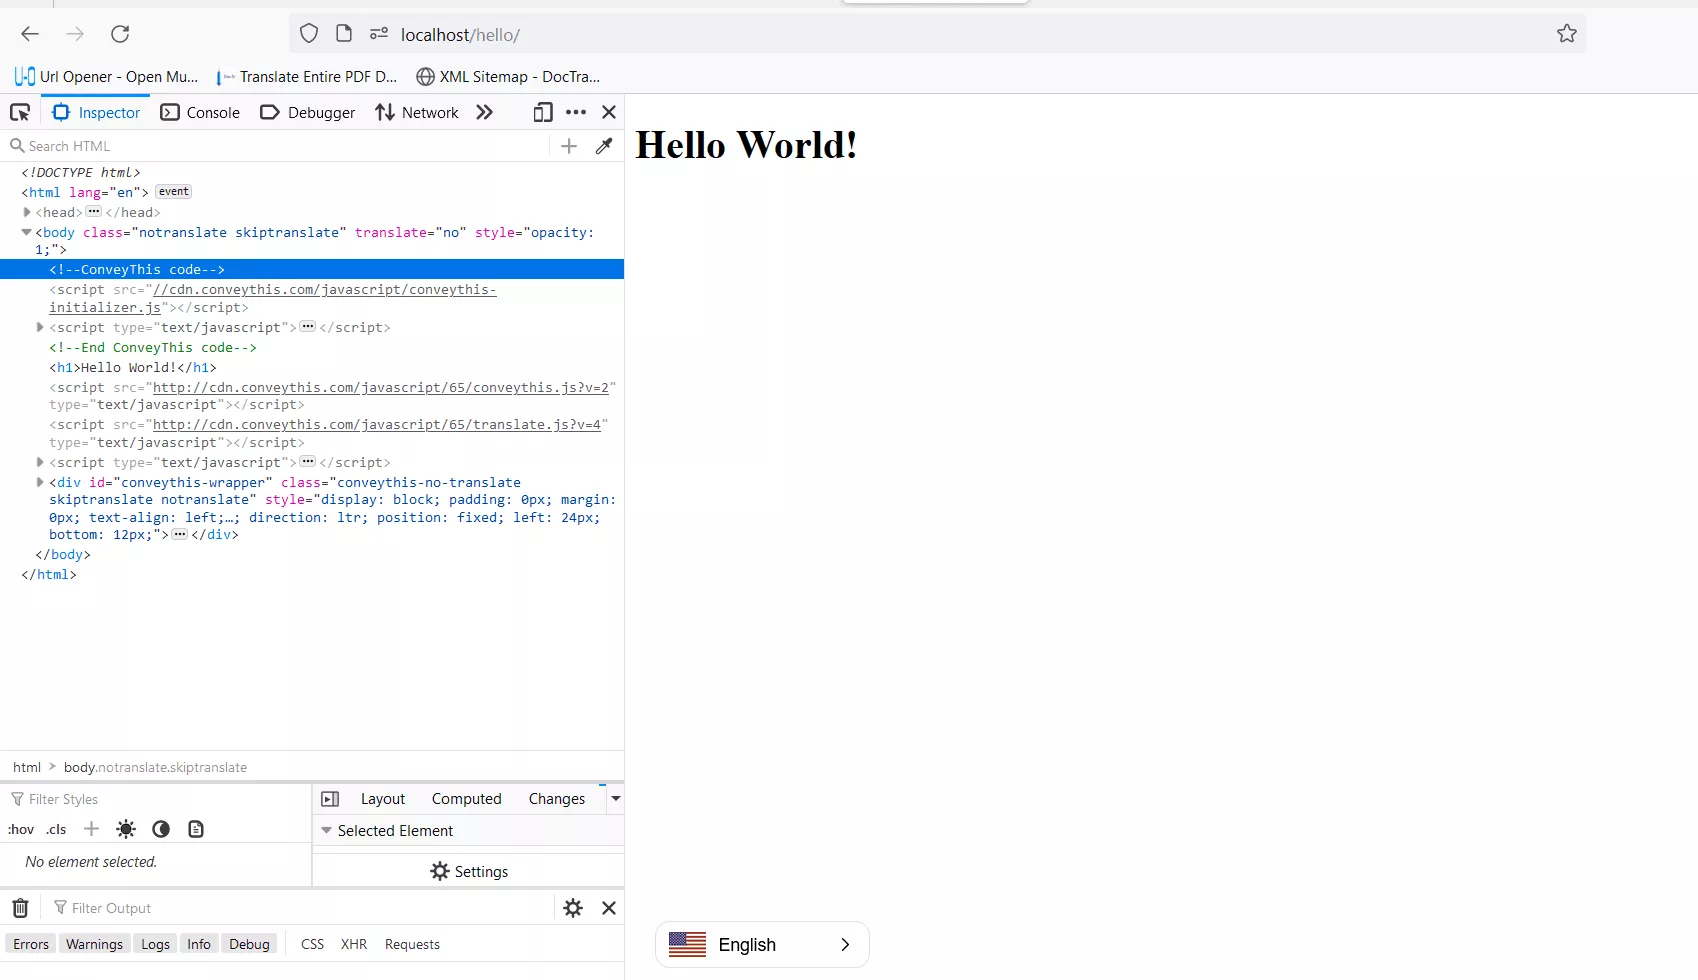
To verify if ConveyThis has been implemented in your localhost, access the web developer tools by opening the application menu in your browser or by using the keyboard shortcut Ctrl + Shift + I.
Using Inspector tool, you should be able to view the ConveyThis code.

2) You’re all done!
That’s it. Go to your website and see the language-switch button at the bottom right. It might take a few minutes to appear, so don’t worry if you must wait a bit.
Try changing the language when the language switcher appears–and, like magic, your website is multilingual! You can now go to your ConveyThis dashboard to manage all your translations.
Congratulations, now you can start translating your website!