How to add CNAME records in DNS manager?
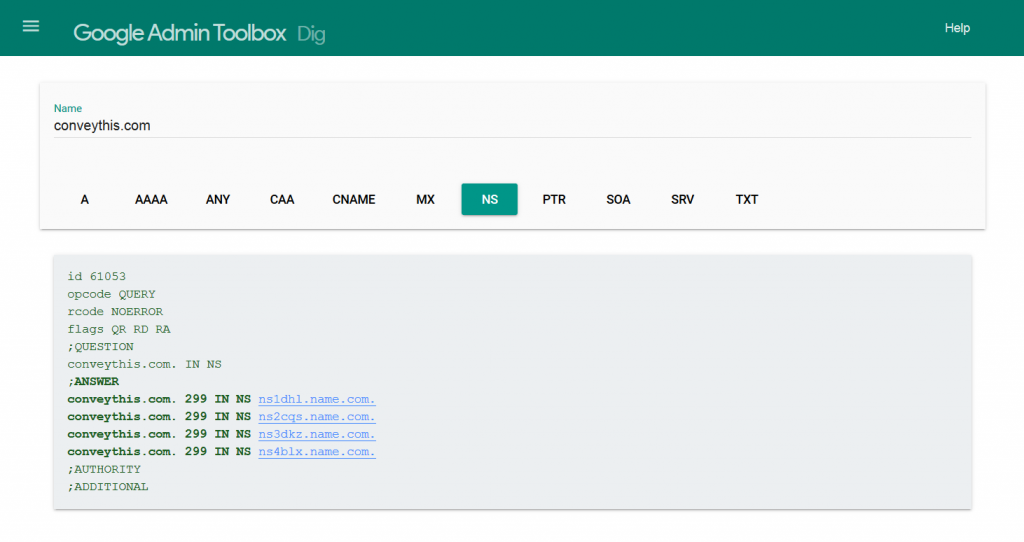
The first step in adding a DNS record is finding out who is your DNS provider for your domain name. Usually it is your domain registrar or your hosting company. You can use DNS Dig Tool to find out your DNS provider easily.
As you see from the screenshot above for our domain name we use Name.com. For your case it may be domaincontrol.com (GoDaddy), systemdns.com or googledomains.com if you bought your domain with Shopify, or some name related to your hosting company which will hint who is your DNS provider.
Below you will find the steps of adding CNAME records in Cloudflare, GoDaddy, Shopify and hostings with cPanel.
Adding a CNAME record in Cloudflare
- Login to your account at cloudflare.com account.
- From the dropdown menu on the top left, select your domain.
- Select the DNS settings tab on top.
- Add the CNAME record to point language code to ConveyThis server name mentioned in your settings instruction.
- Make sure the Cloud icon is turned off to bypass Cloudflare.
- Click Save.

Adding a CNAME record in GoDaddy
- Log in to your account at godaddy.com by clicking the My Account tab.
- Under the All Domains section, find your domain you want to configure and click on the domain name link to open the domain settings page.
- Open the Manage DNS link on the bottom of the domain settings page.
- Click on the Add button under the Records list in DNS Manager.
- Set Type to CNAME.
- Set Host to the language code you wish to add.
- Add the CNAME record to point language code to ConveyThis server name mentioned in your settings instruction.
- Click Save.

Adding a CNAME record in hosting control panel (cPanel)
- Login into your hosting panel
- Open the DNS Simple Zone Editor
- Under “Add a CNAME Record” section set Name to the language code you wish to add and CNAME to ConveyThis server name mentioned in your settings instruction.
- Click Add CNAME Record button.

Adding a CNAME record in Shopify
If you bought your domain name from Shopify directly you will need to follow the steps below:
- From your Shopify admin, go to Online Store → Domains.
- In the domains list section, click Manage.
- Click DNS Settings on top of the screen.
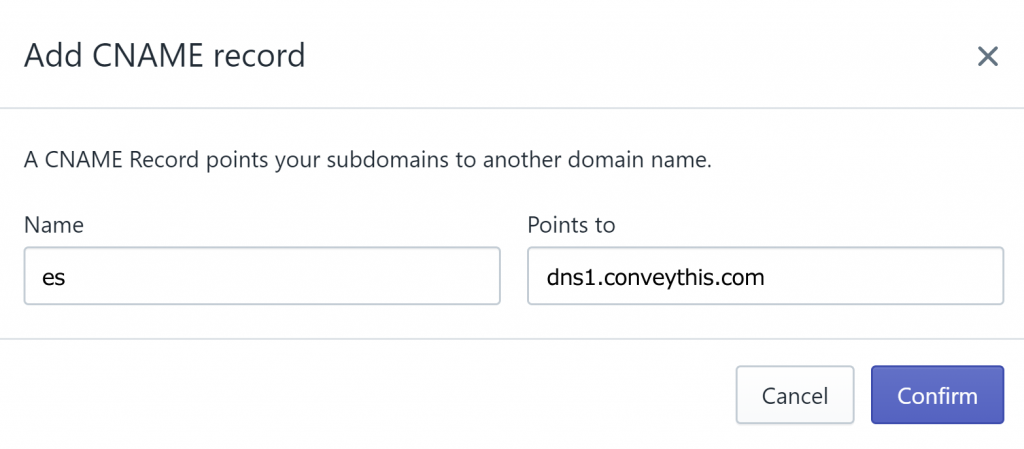
- Click Add custom record and select the CNAME record type.
- Set Name to the language code you want to add and Points to to ConveyThis server name mentioned in your settings instruction.
- Click Confirm.

Add a CNAME record (host-specific steps)
You can find more info about adding CNAME records for host specific cases on https://support.google.com/a/topic/1615038
Verifying that the CNAME record has been added
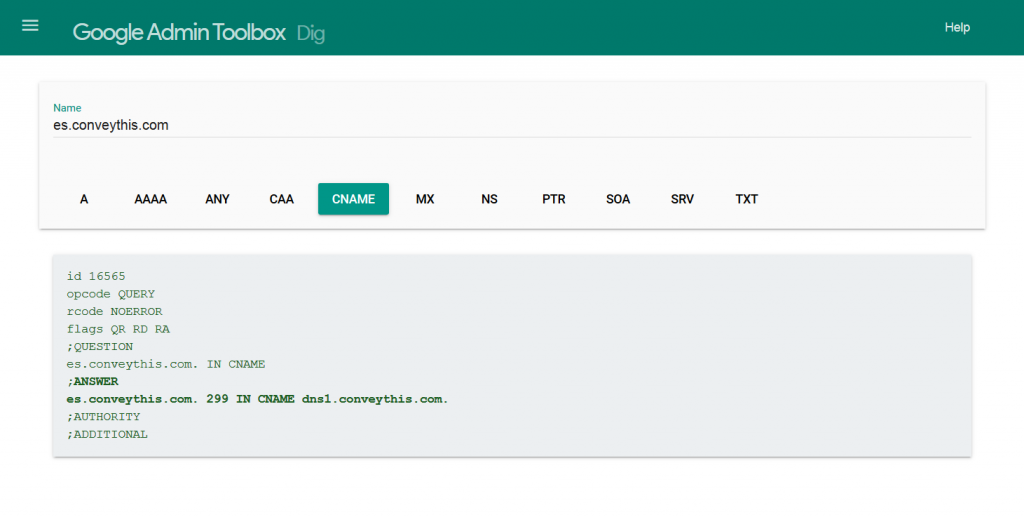
To verify that the CNAME record was successfully added you can use DNS Dig Tool.

If everything is done properly you will see the ConveyThis server name in the Answer section.
Note: If you are having issues finding your DNS manager or adding CNAME records in your DNS manager, feel free to contact us at [email protected]
